Before you start
This is a plain-English Meshtastic setup guide based on the latest Android app notes for June 2026. The goal is to get a beginner node working without needing to understand every radio detail first.
If you are in Southern California, the SoCalMesh Discord is strongly recommended. The Parrot bot can help confirm that your messages are reaching the mesh.
1. User settings
Start with identity. This is how people can recognize you and reply.
User settings Screenshots

2. LoRa settings (important)
These settings control the radio side of Meshtastic. For beginners, start conservative and avoid flooding the network.
Long_Fast. When ready,
try Medium_Fast for less traffic.LoRa settings Screenshots

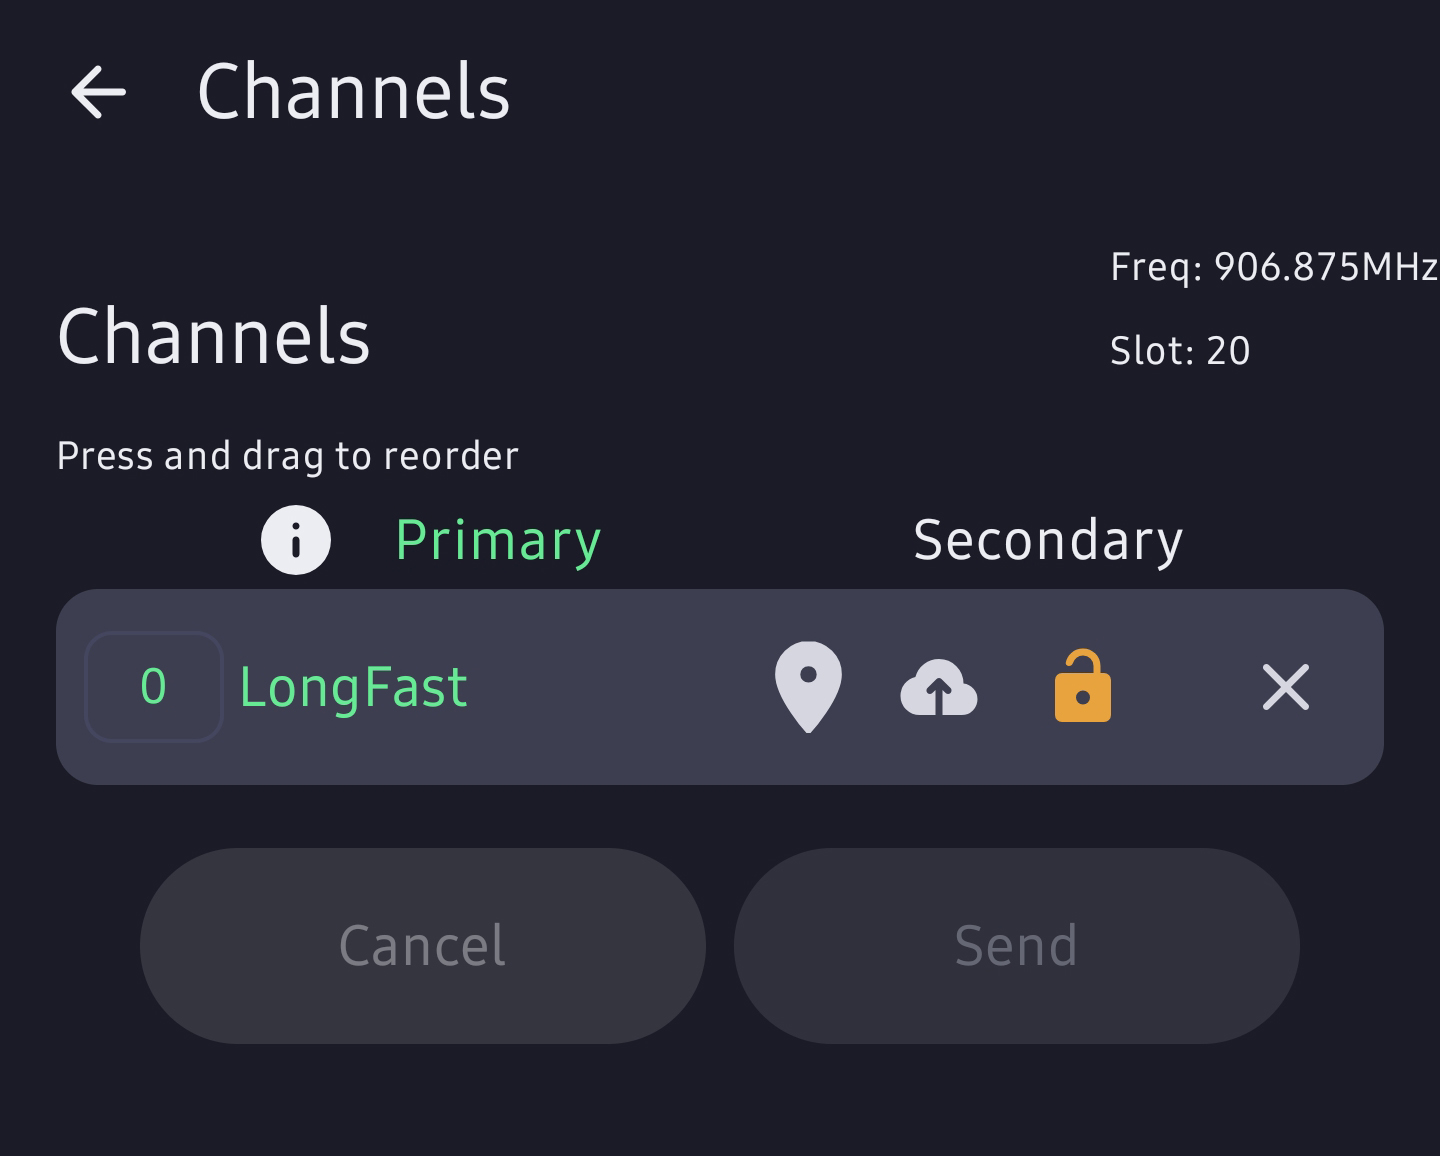
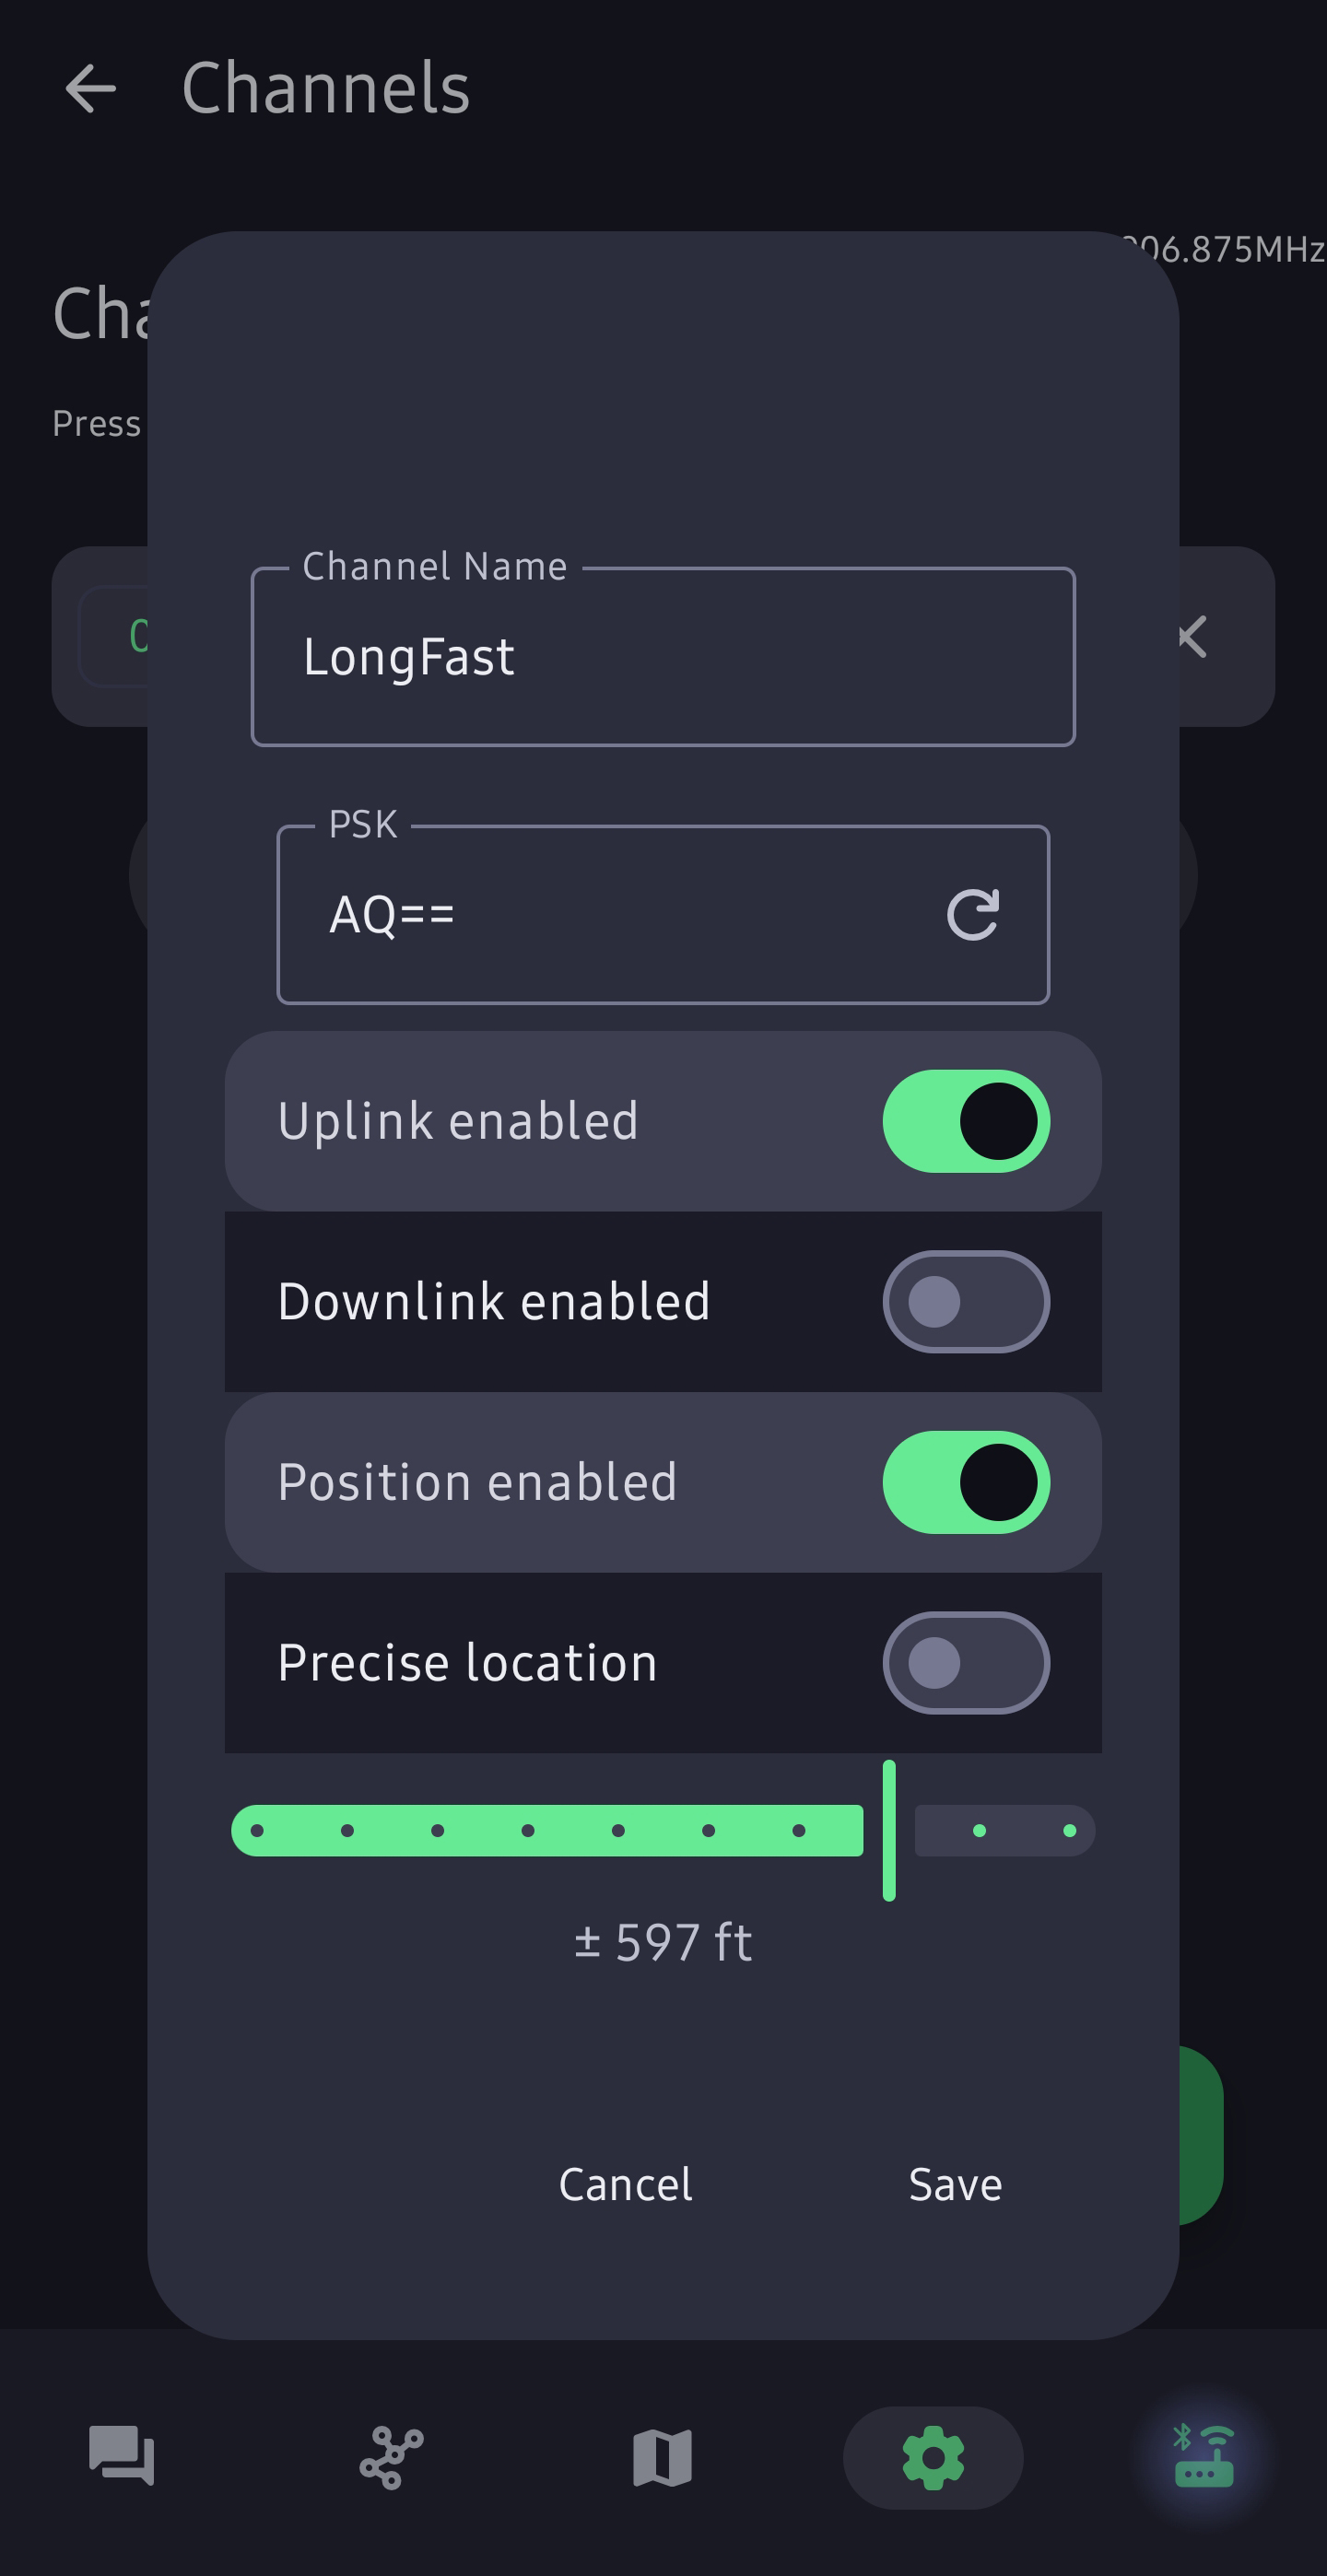
3. Channel configuration
On the LongFast channel, use these settings as a basic starter setup.
Channels Screenshots

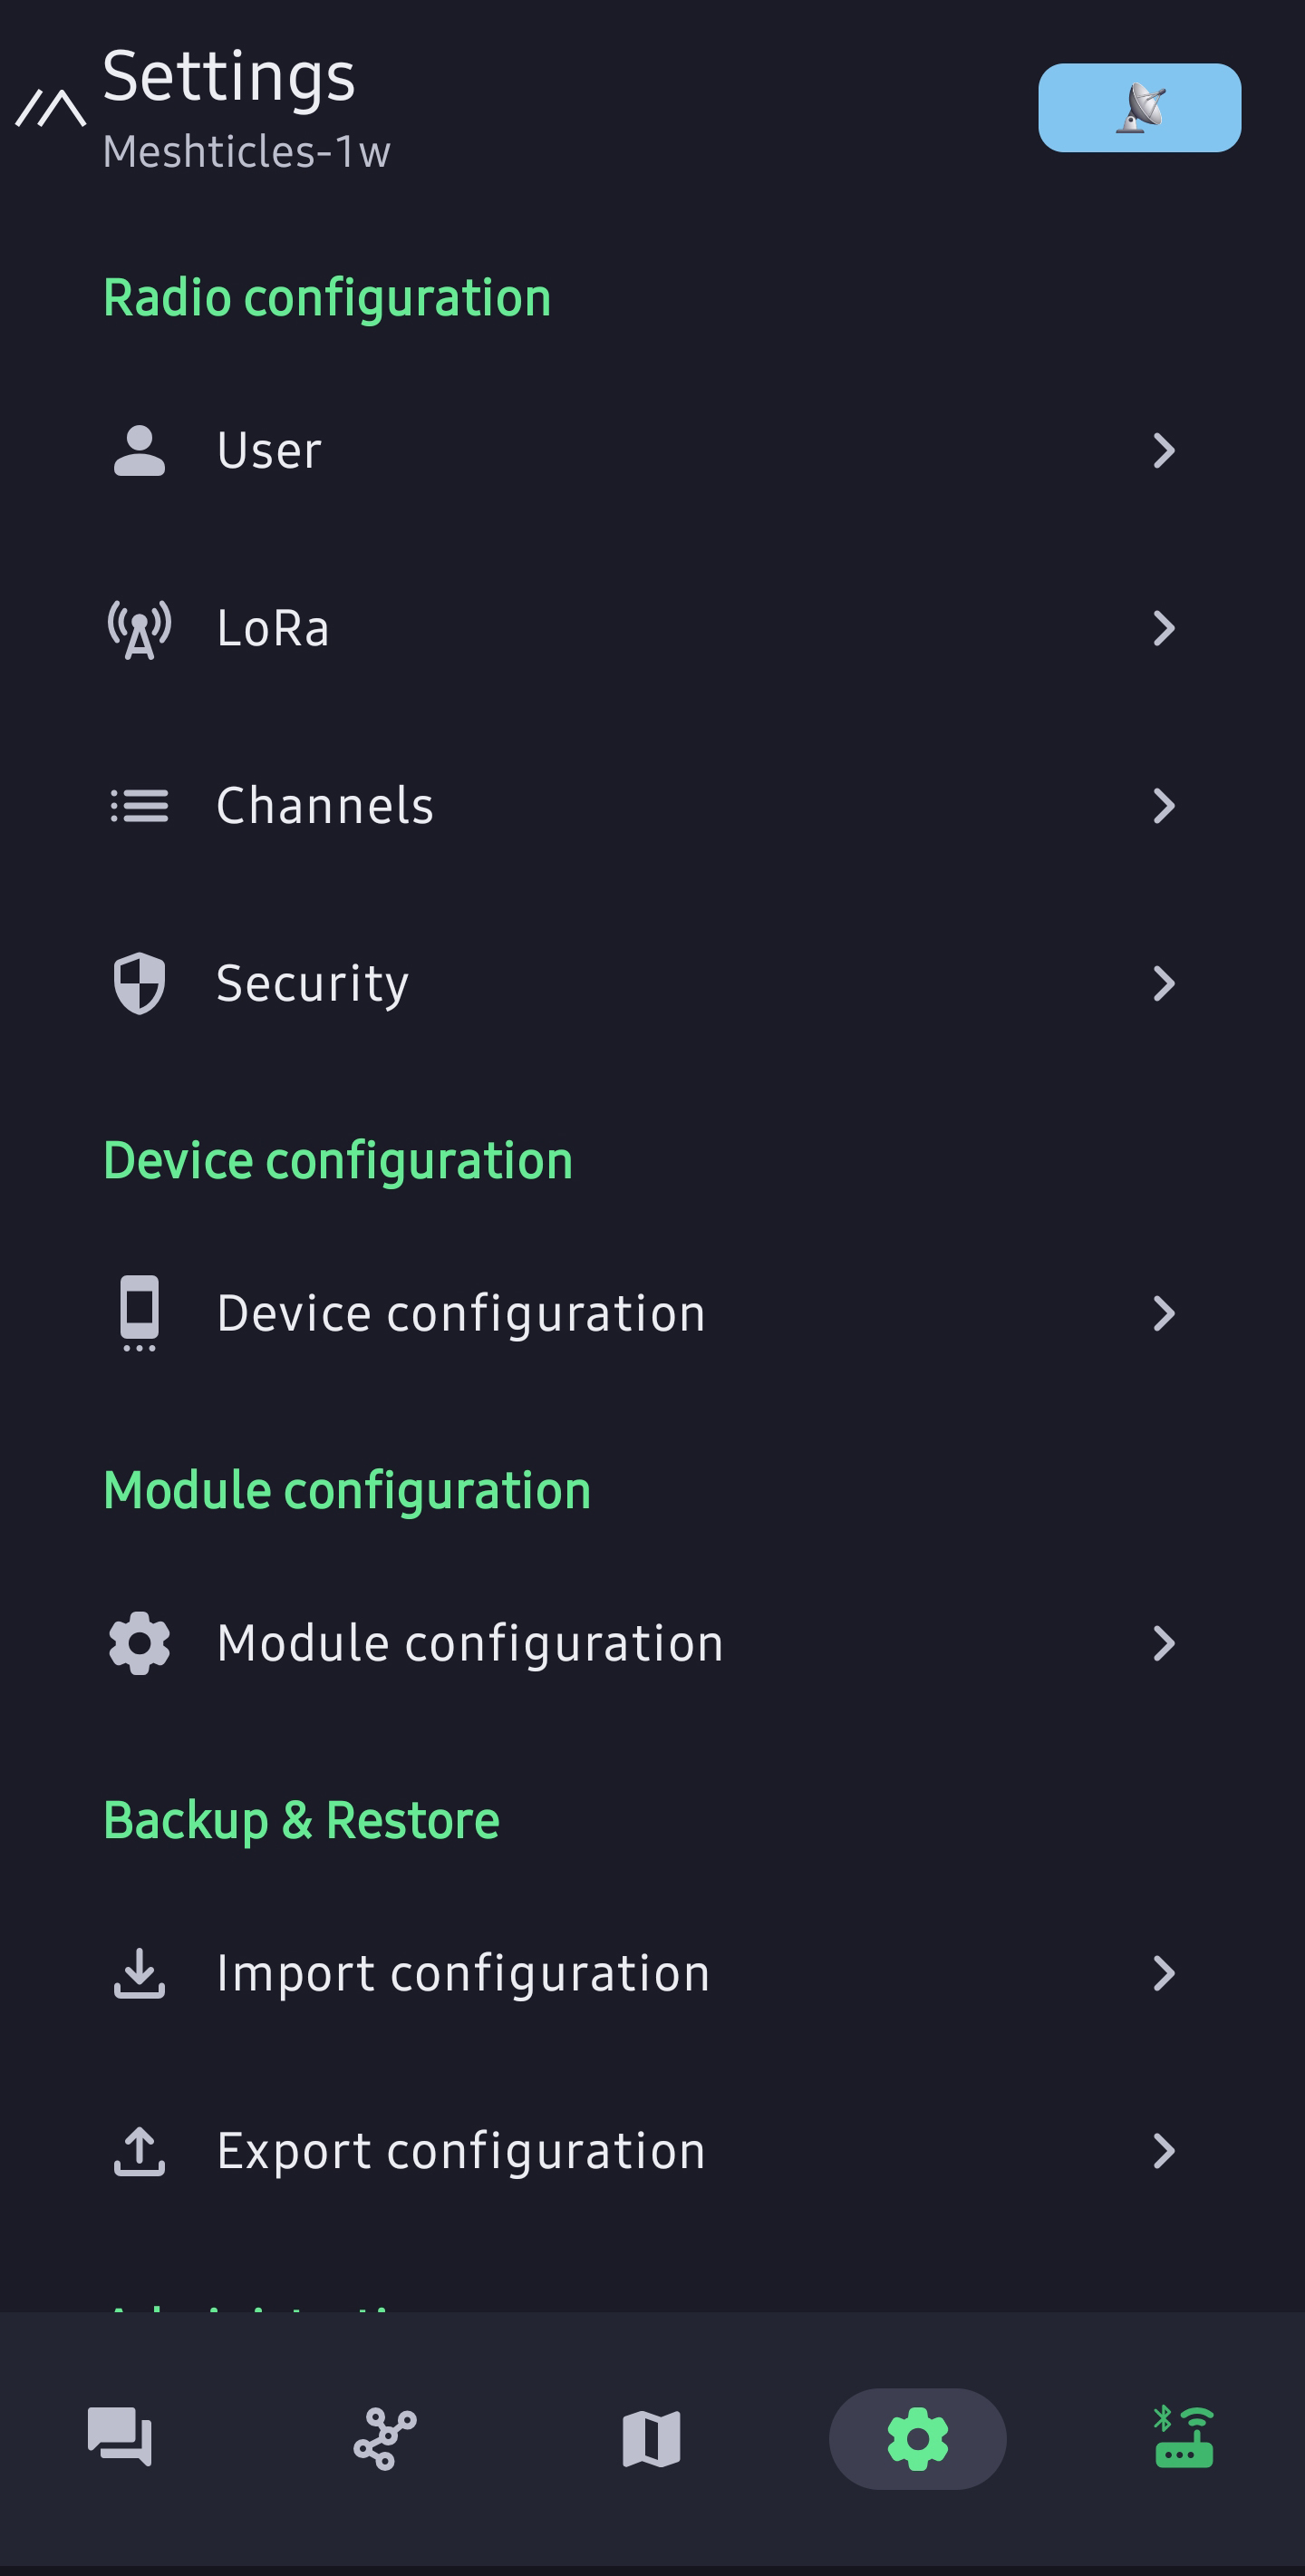
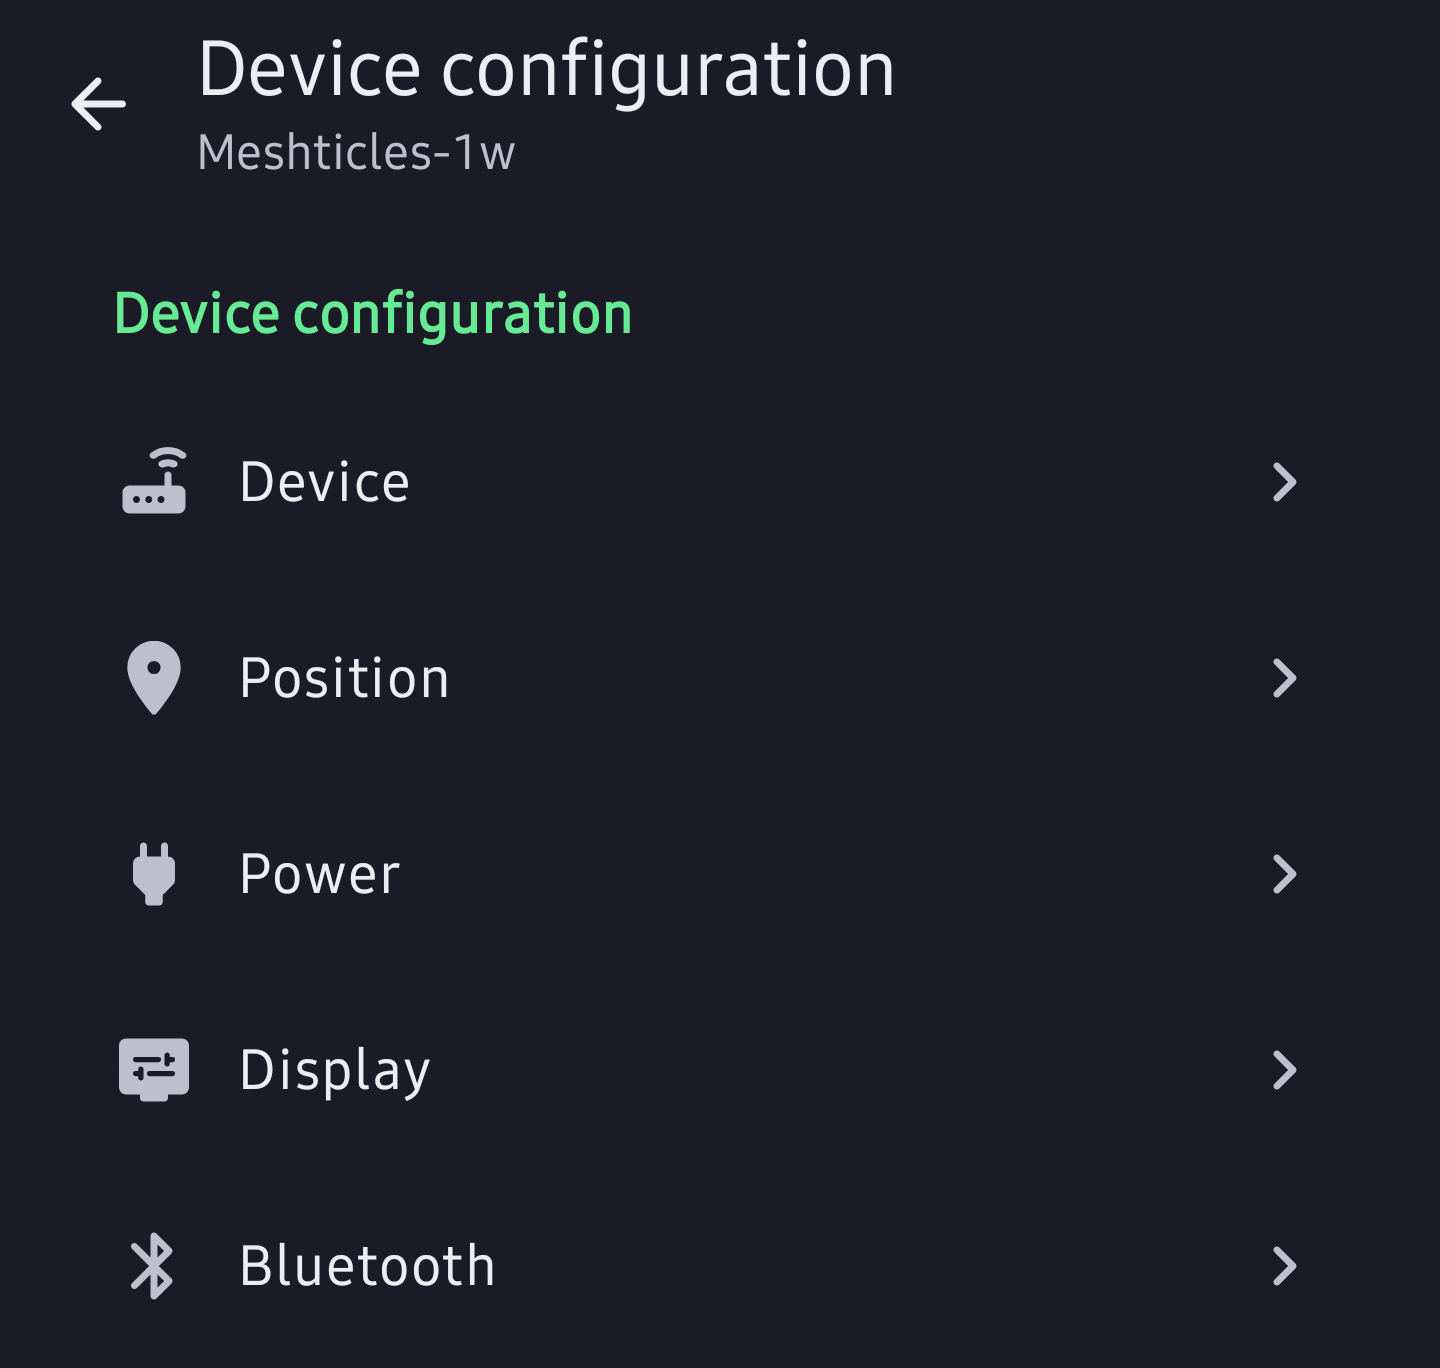
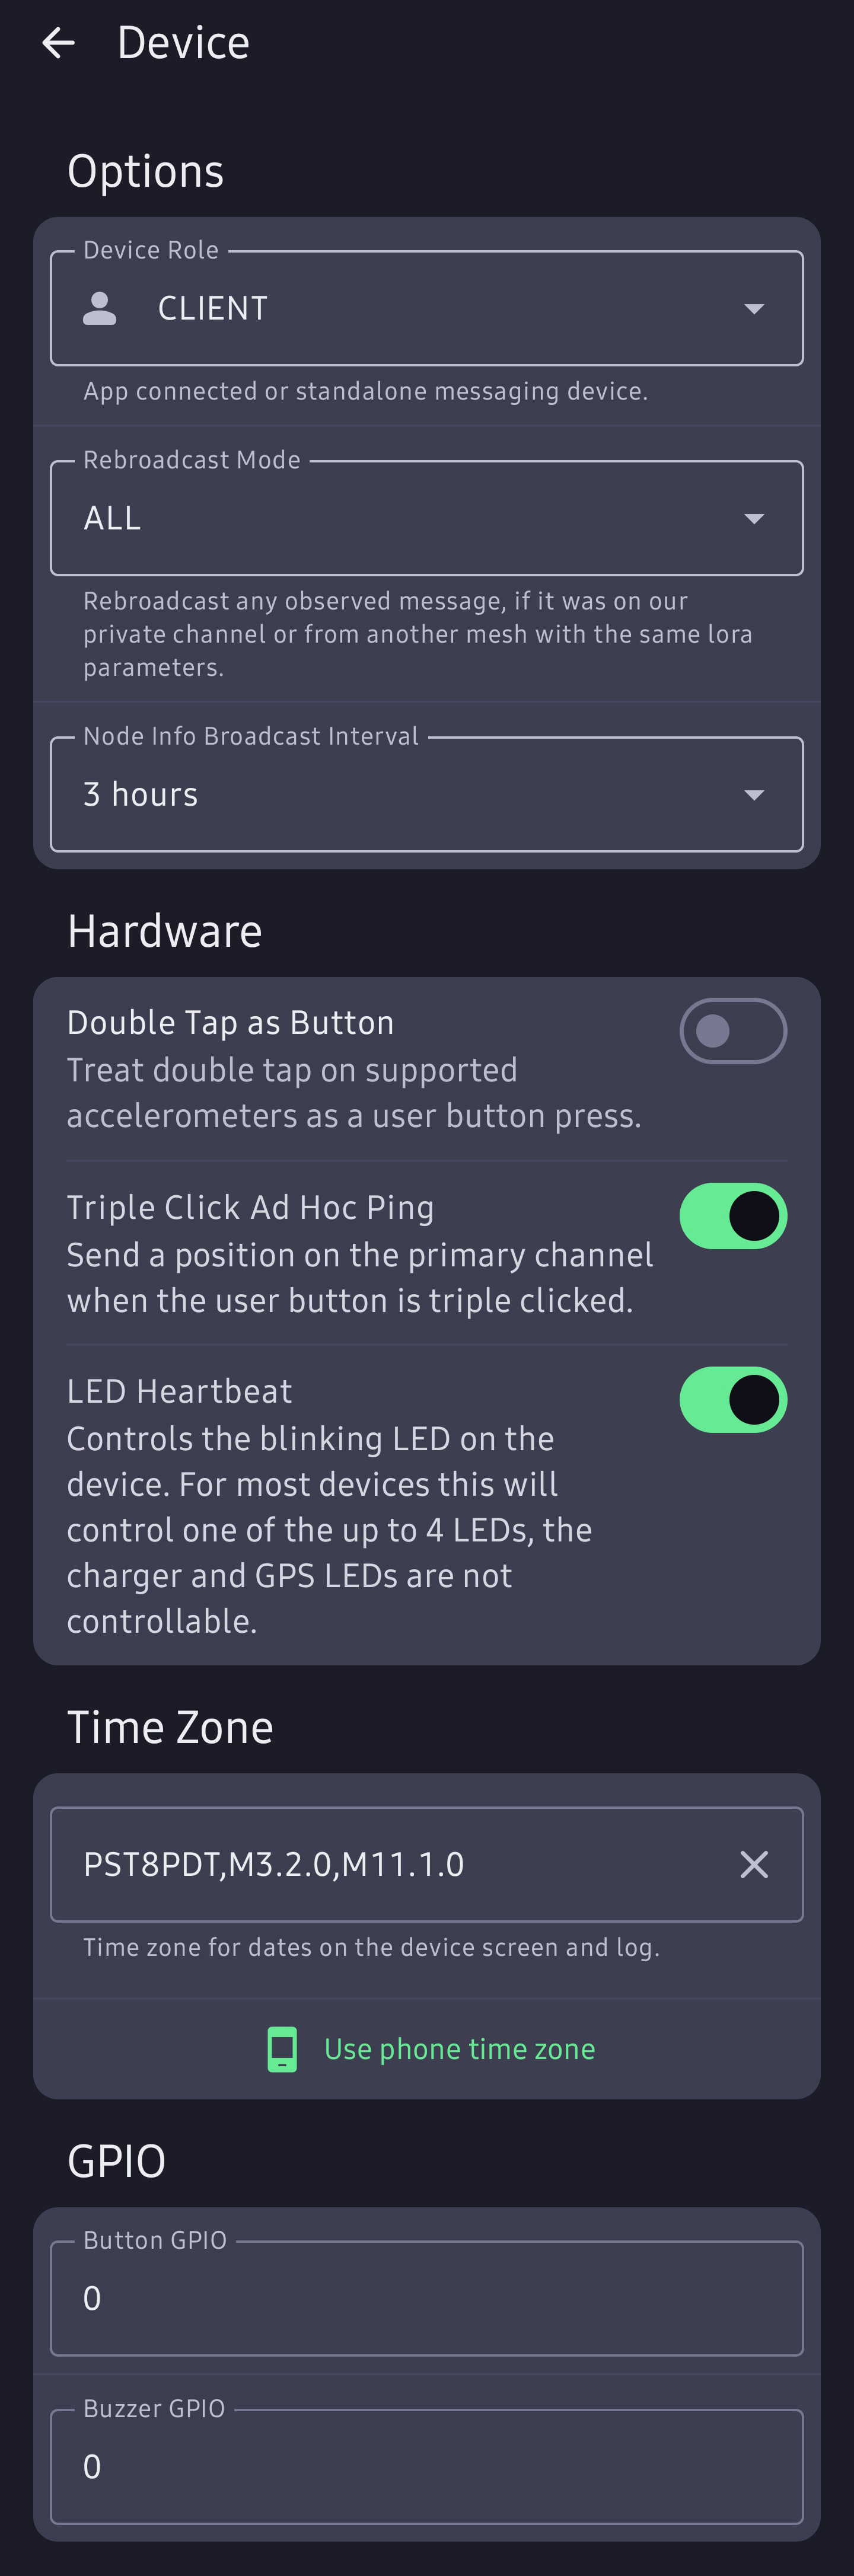
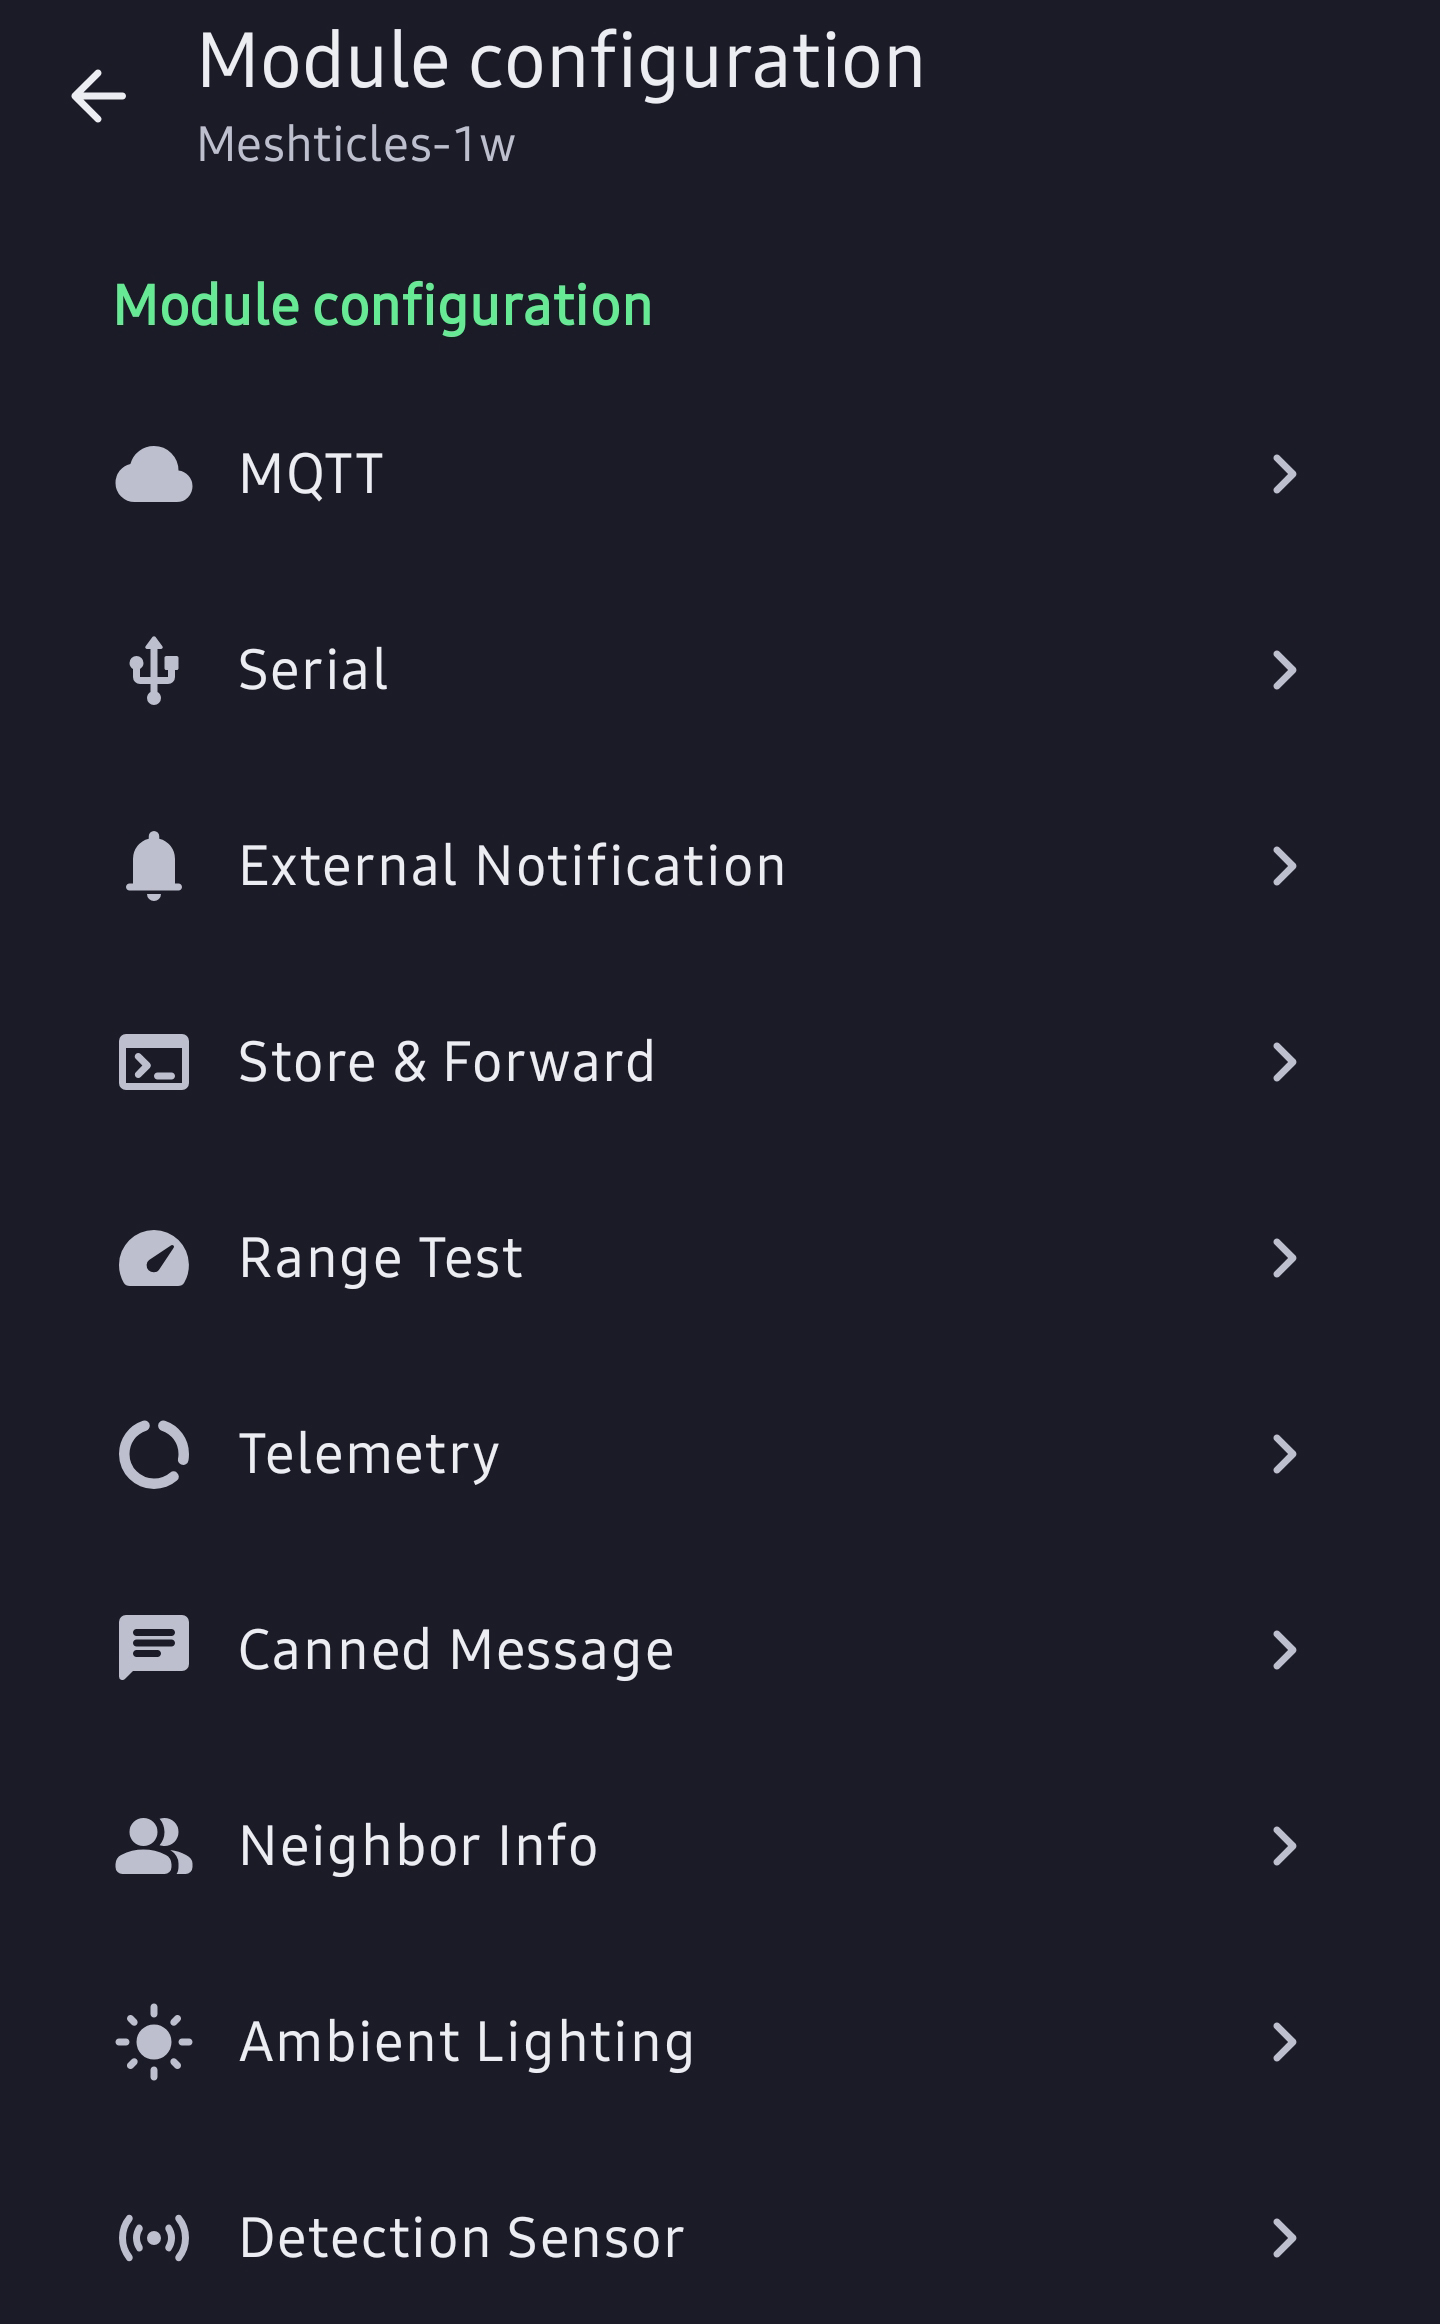
4. Device configuration
These settings make your node behave like a normal user node and help others identify it.
Device Details Screenshots
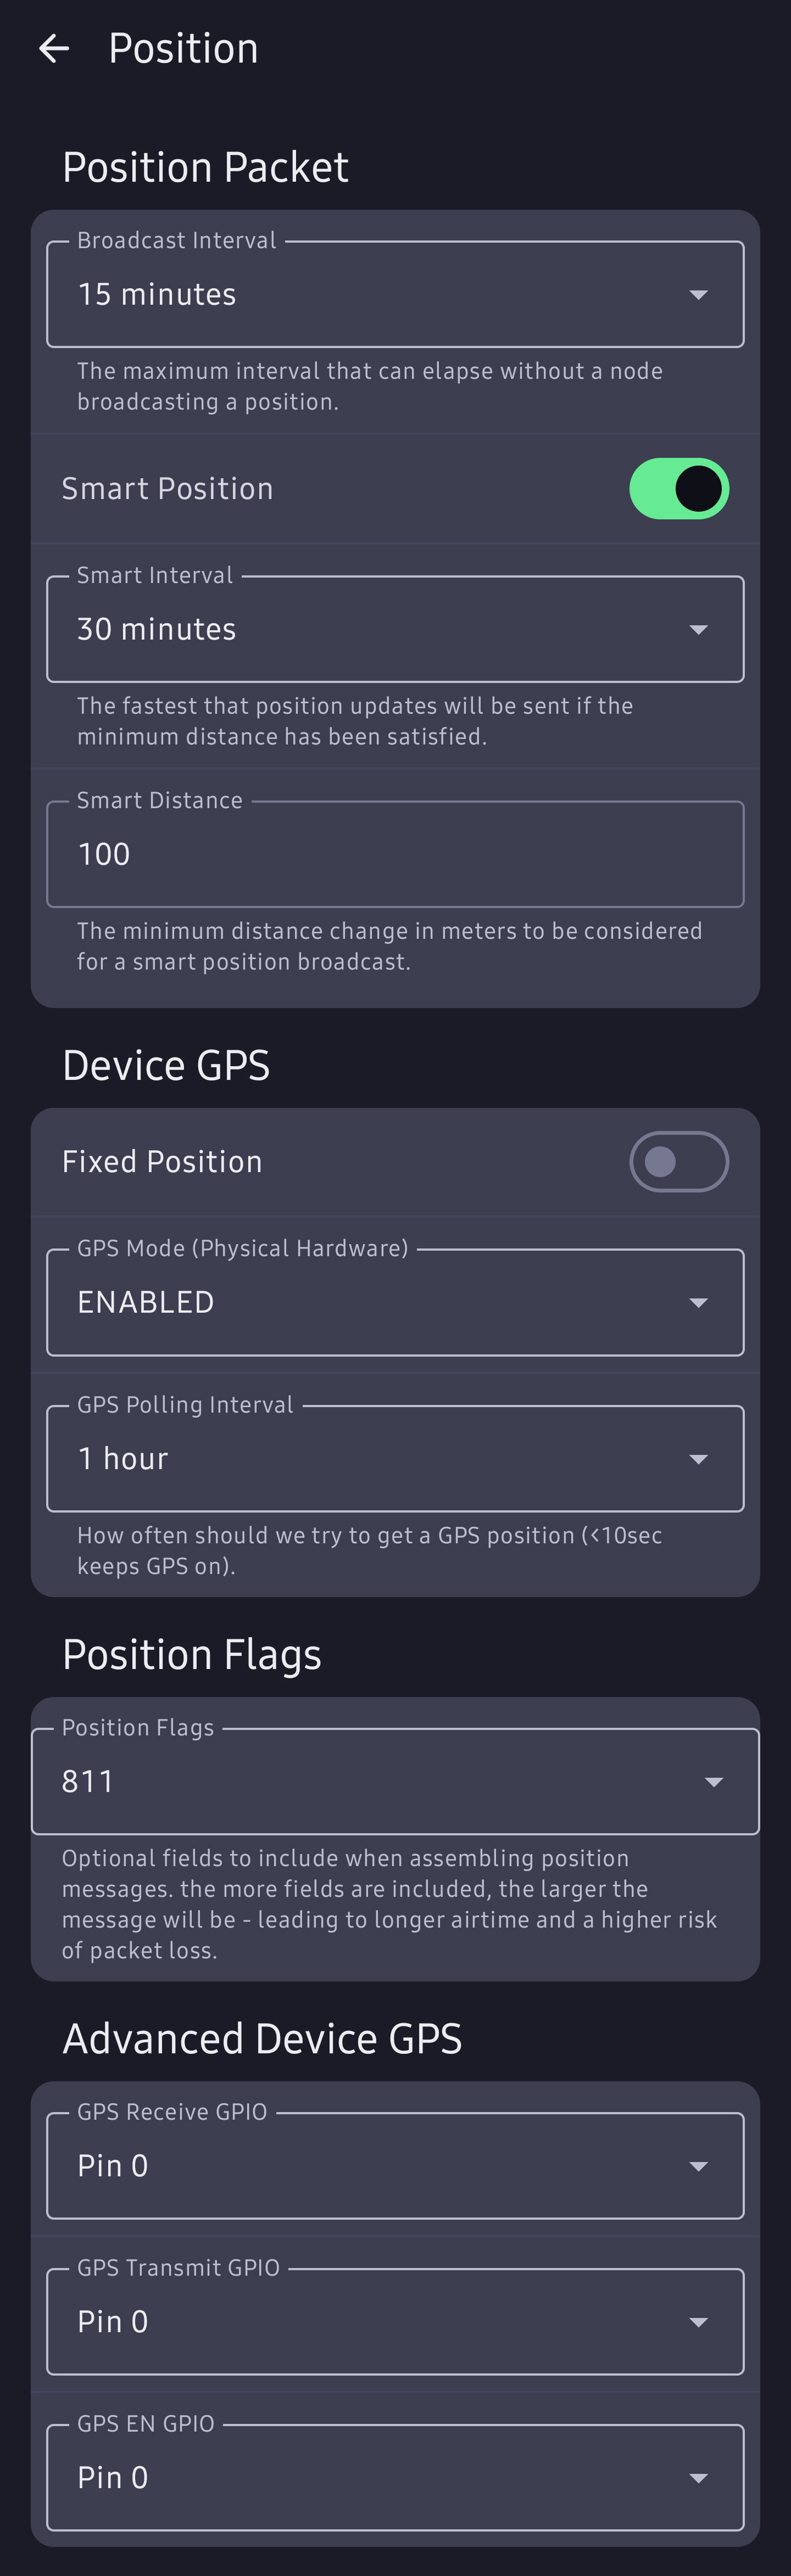
5. Position settings
Position settings depend on whether the node is mobile or fixed.
- Broadcast Interval: 15 or 30 minutes. Shorter intervals create more mesh traffic.
- Smart Position: checked.
- Smart Interval: make it the same as broadcast.
- Use Fixed Position only for non-mobile nodes.
- Set intervals much longer because the node location is not changing often.
Device position Screenshots
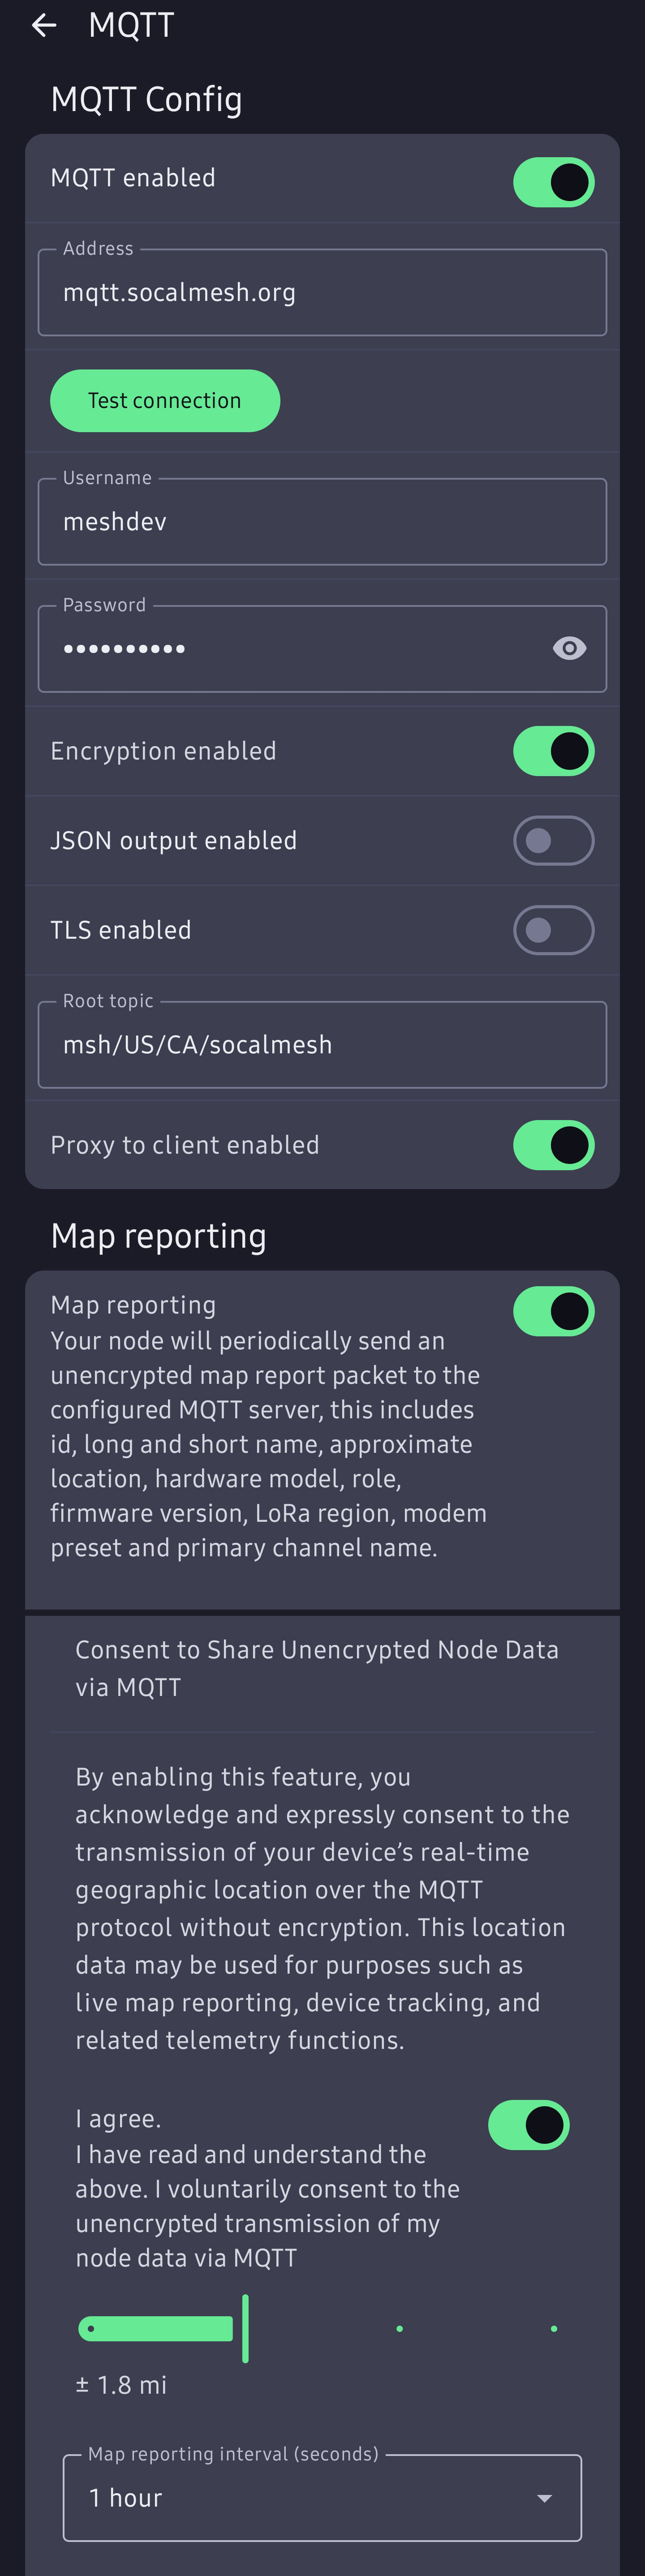
6. MQTT (optional)
MQTT is not really “mesh” in the pure radio sense because it uses the internet to send your messages and is not necessary to function. Think of it as last resort turning your phone and device into complicated SMS.
mqtt.socalmesh.orgmsh/US/CA/socalmesh (case
sensitive.)MQTT settings Screenshots
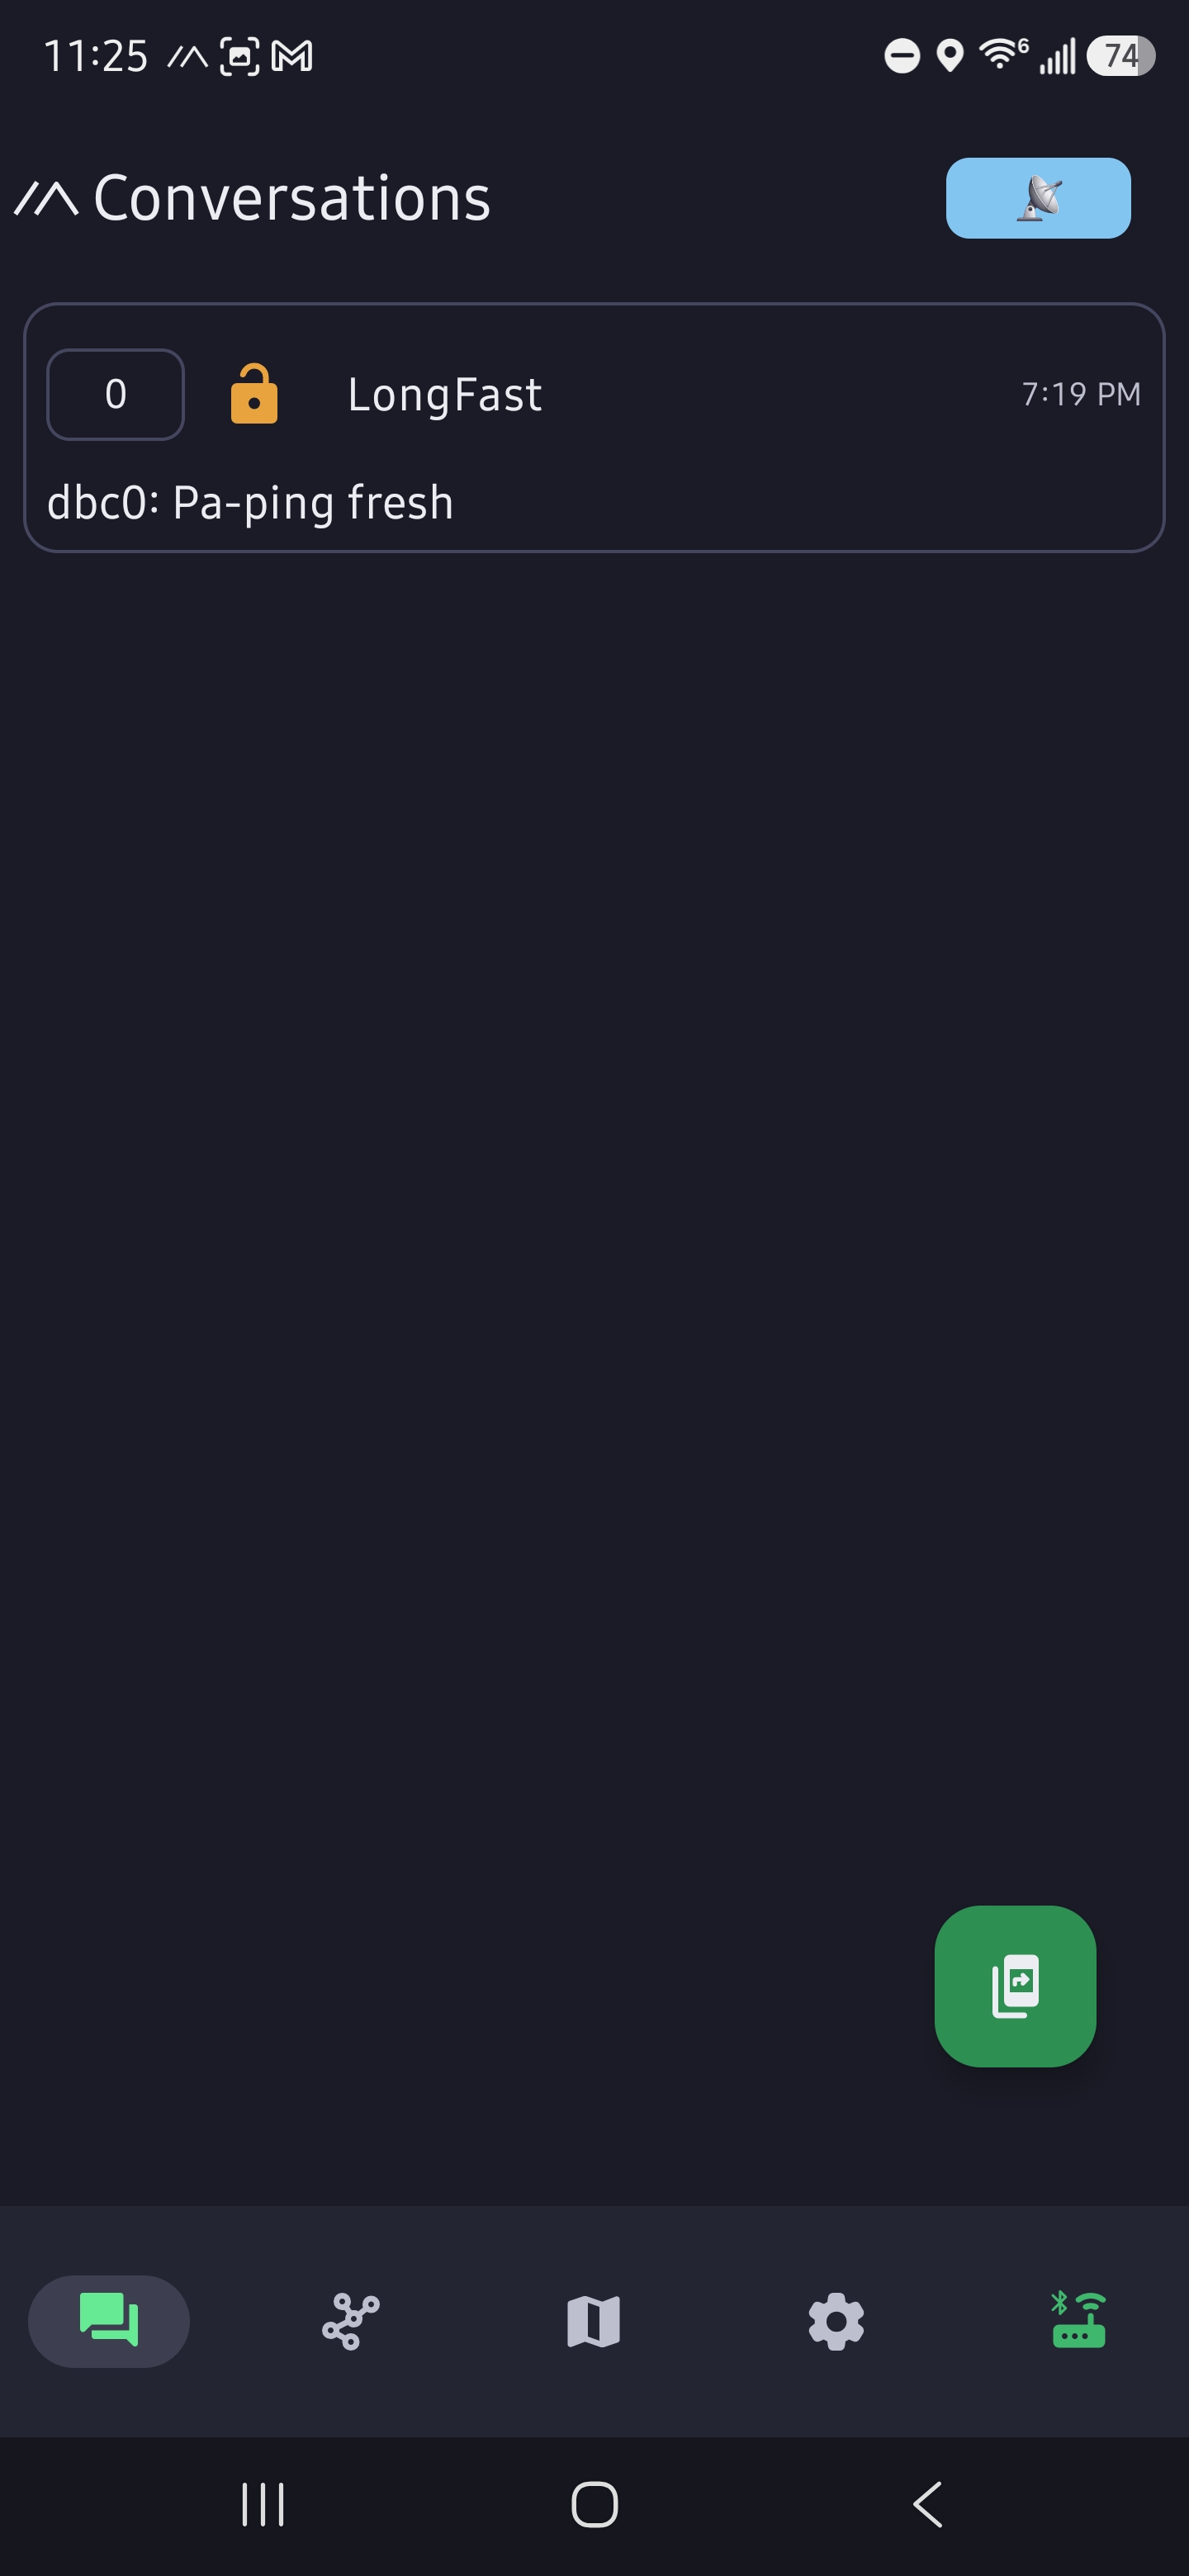
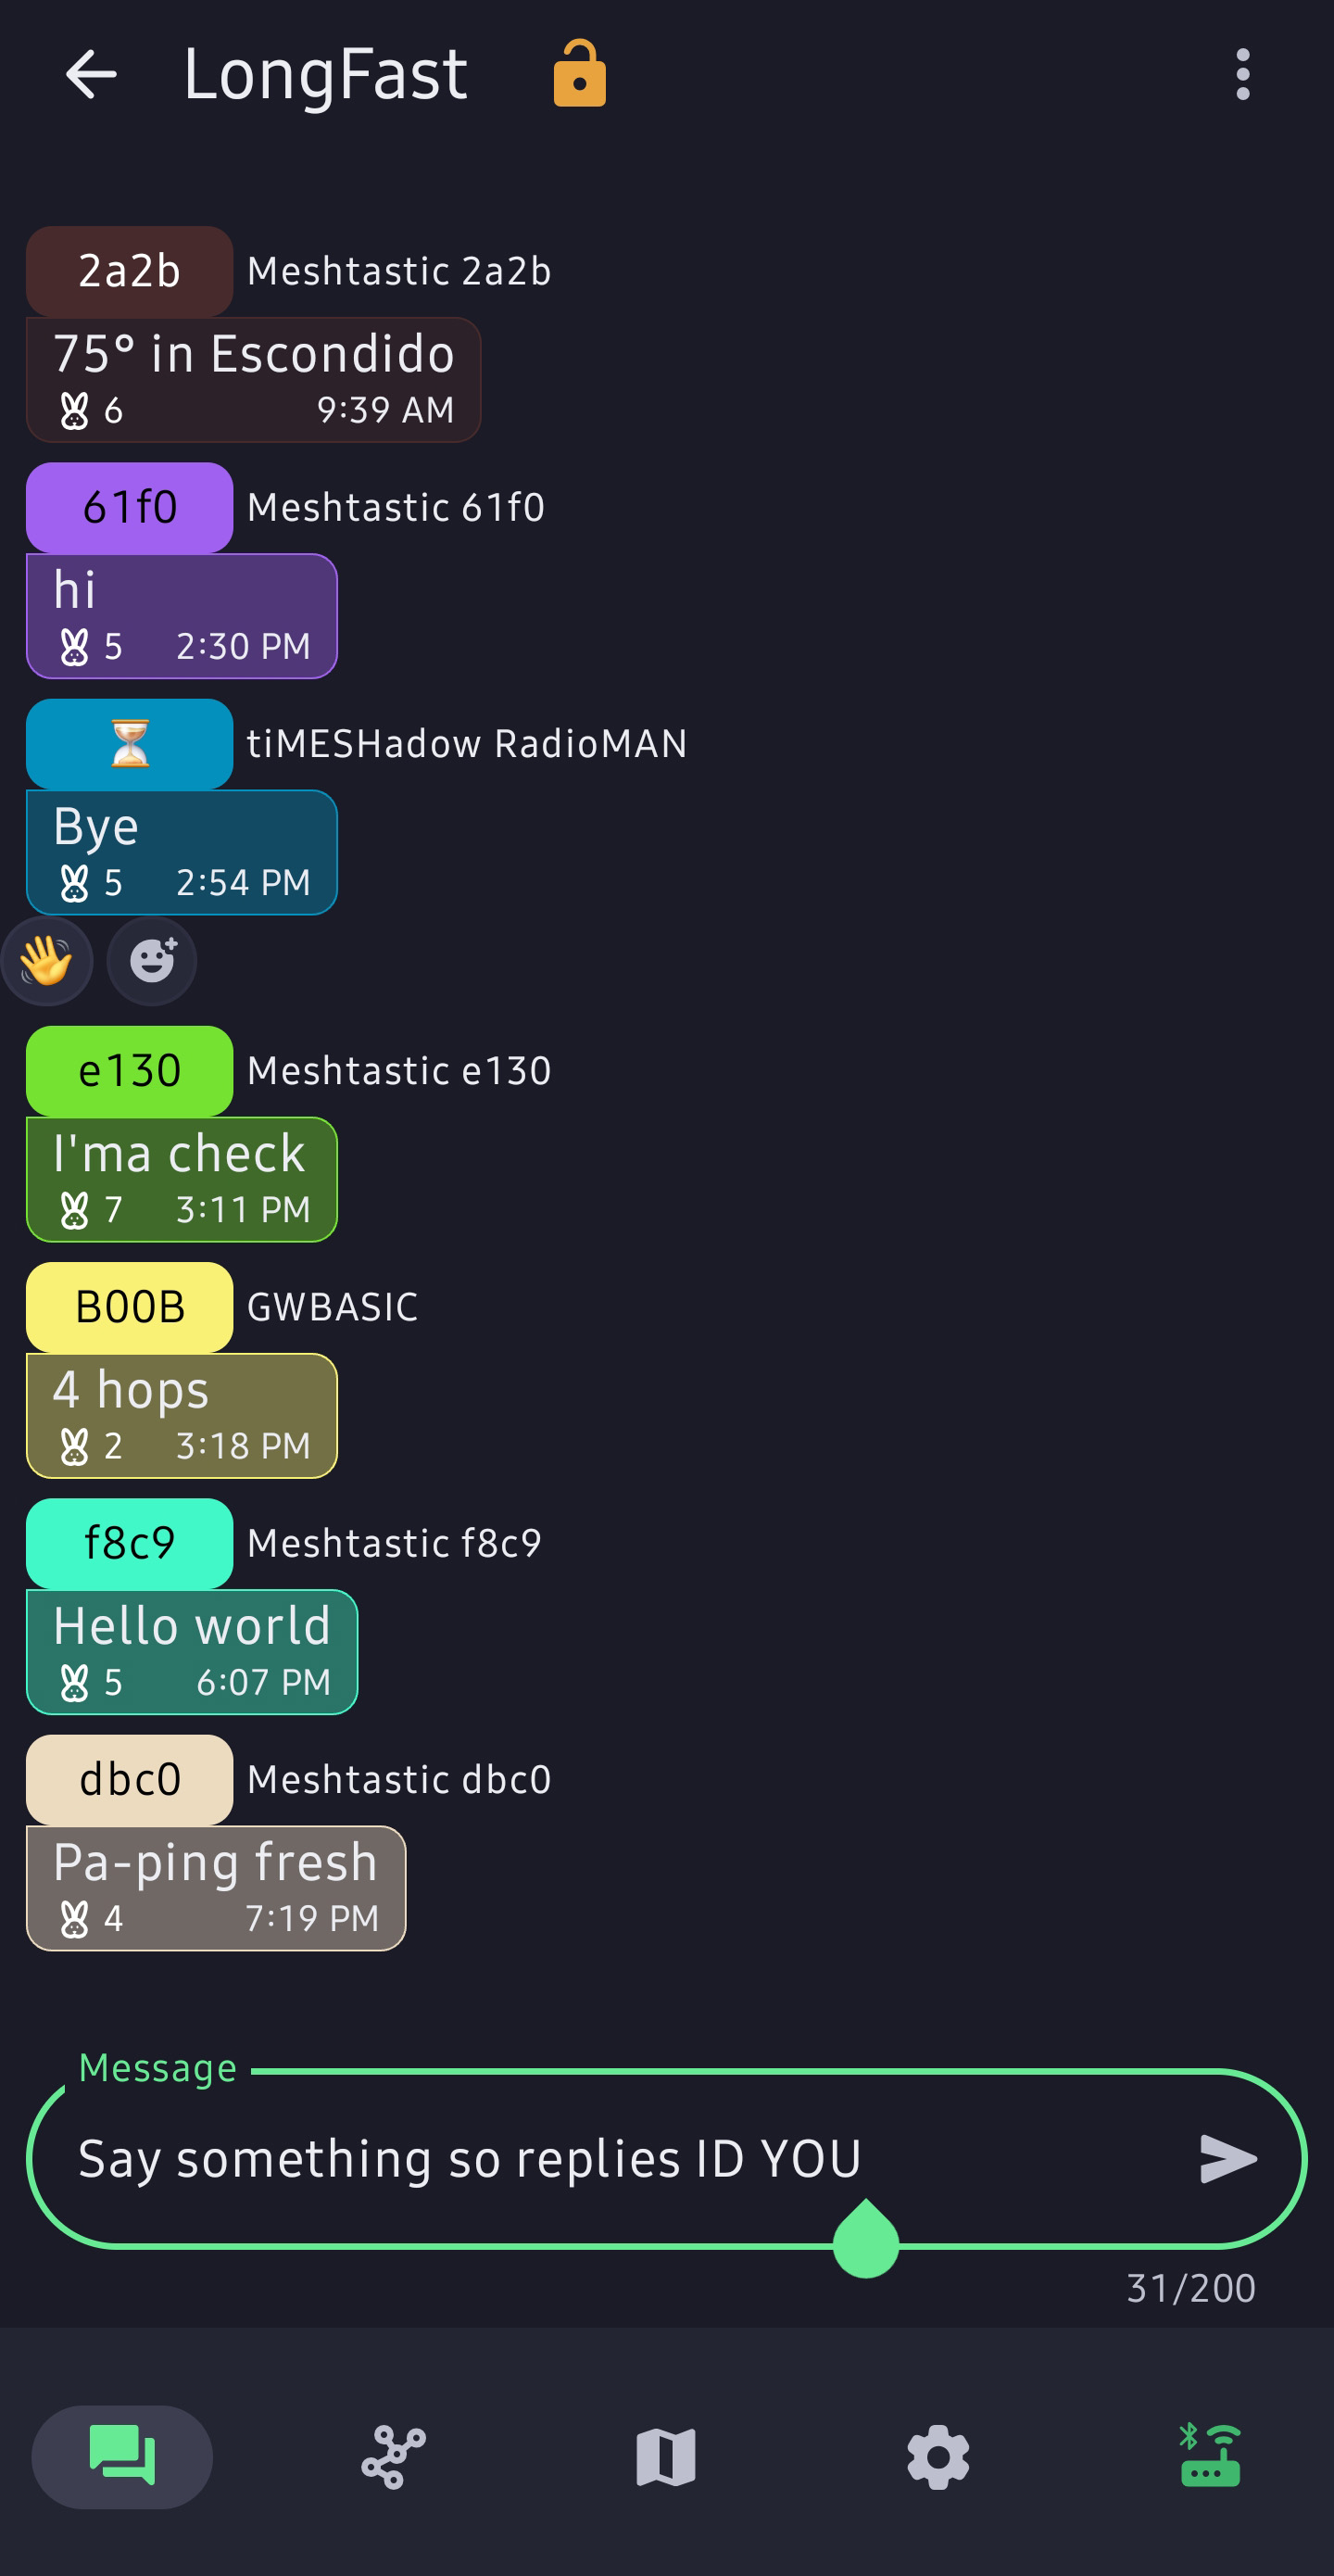
7. Your first test message etiquette
Go outside
If you cannot see nodes, give yourself about 15 minutes and get elevation. A parking garage top floor, hill, or open area can make a big difference.
Prepare your test message- Open Messages
- Select Long_Fast
- Enter something so replies are to you, not the void.
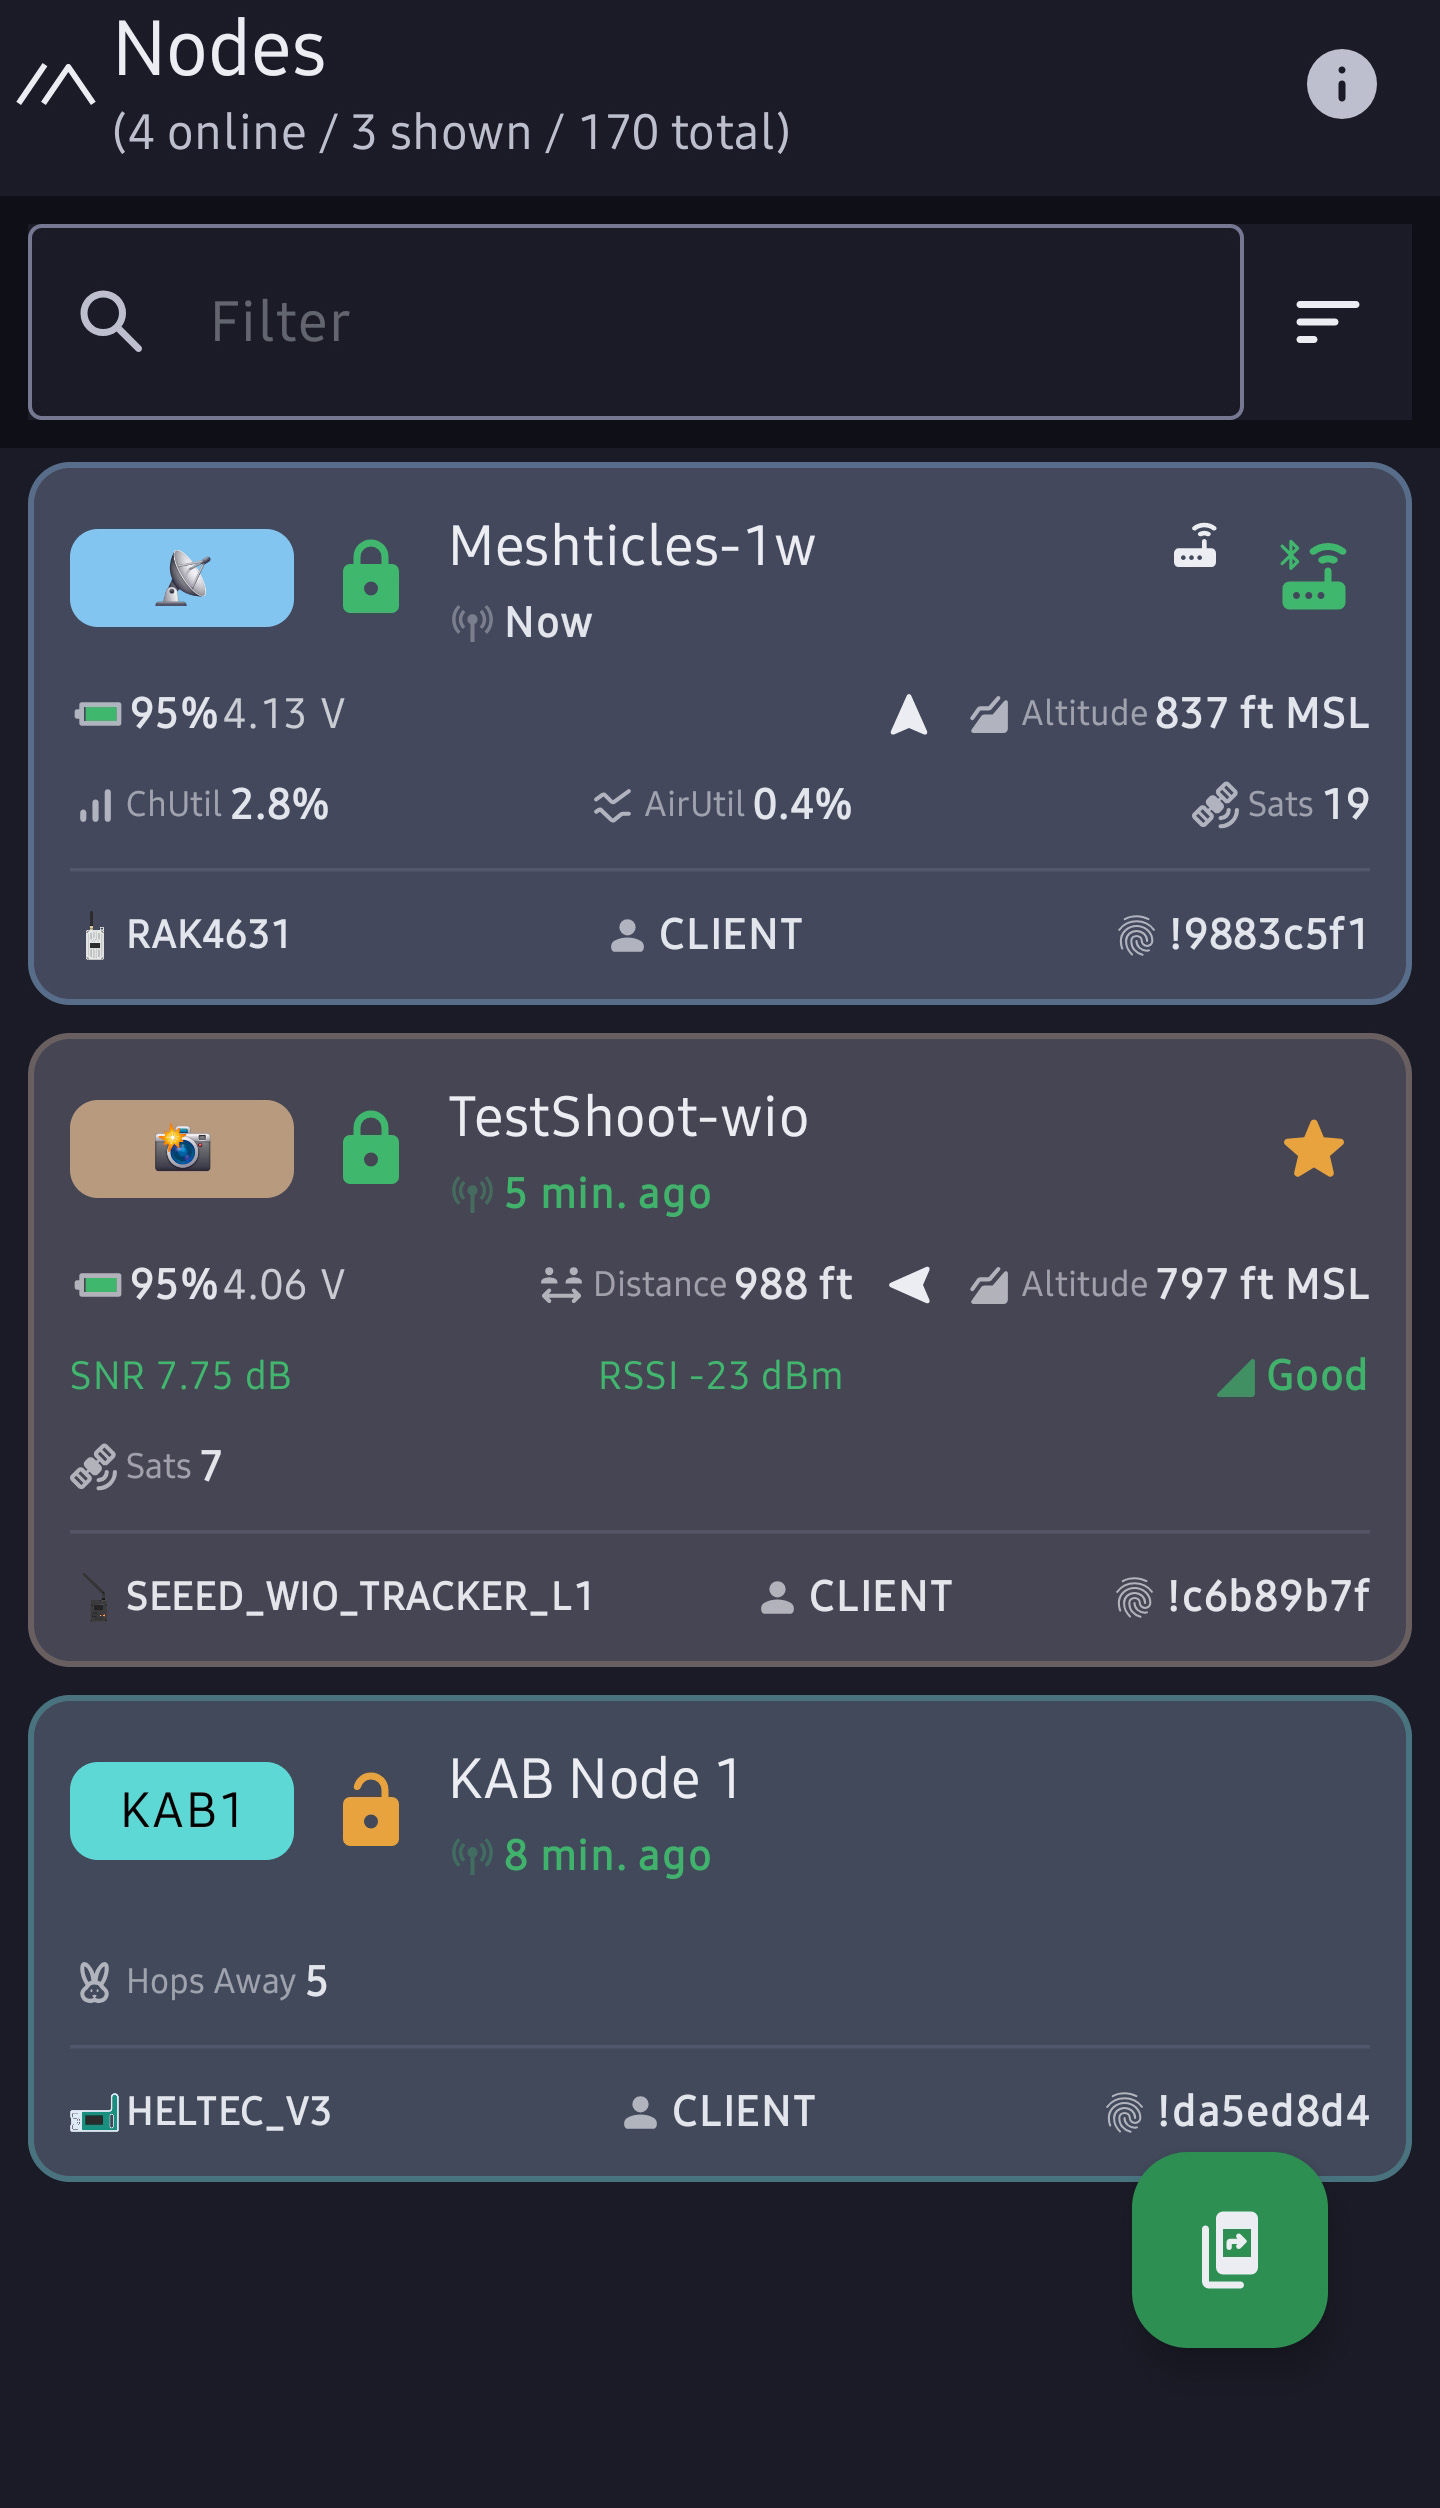
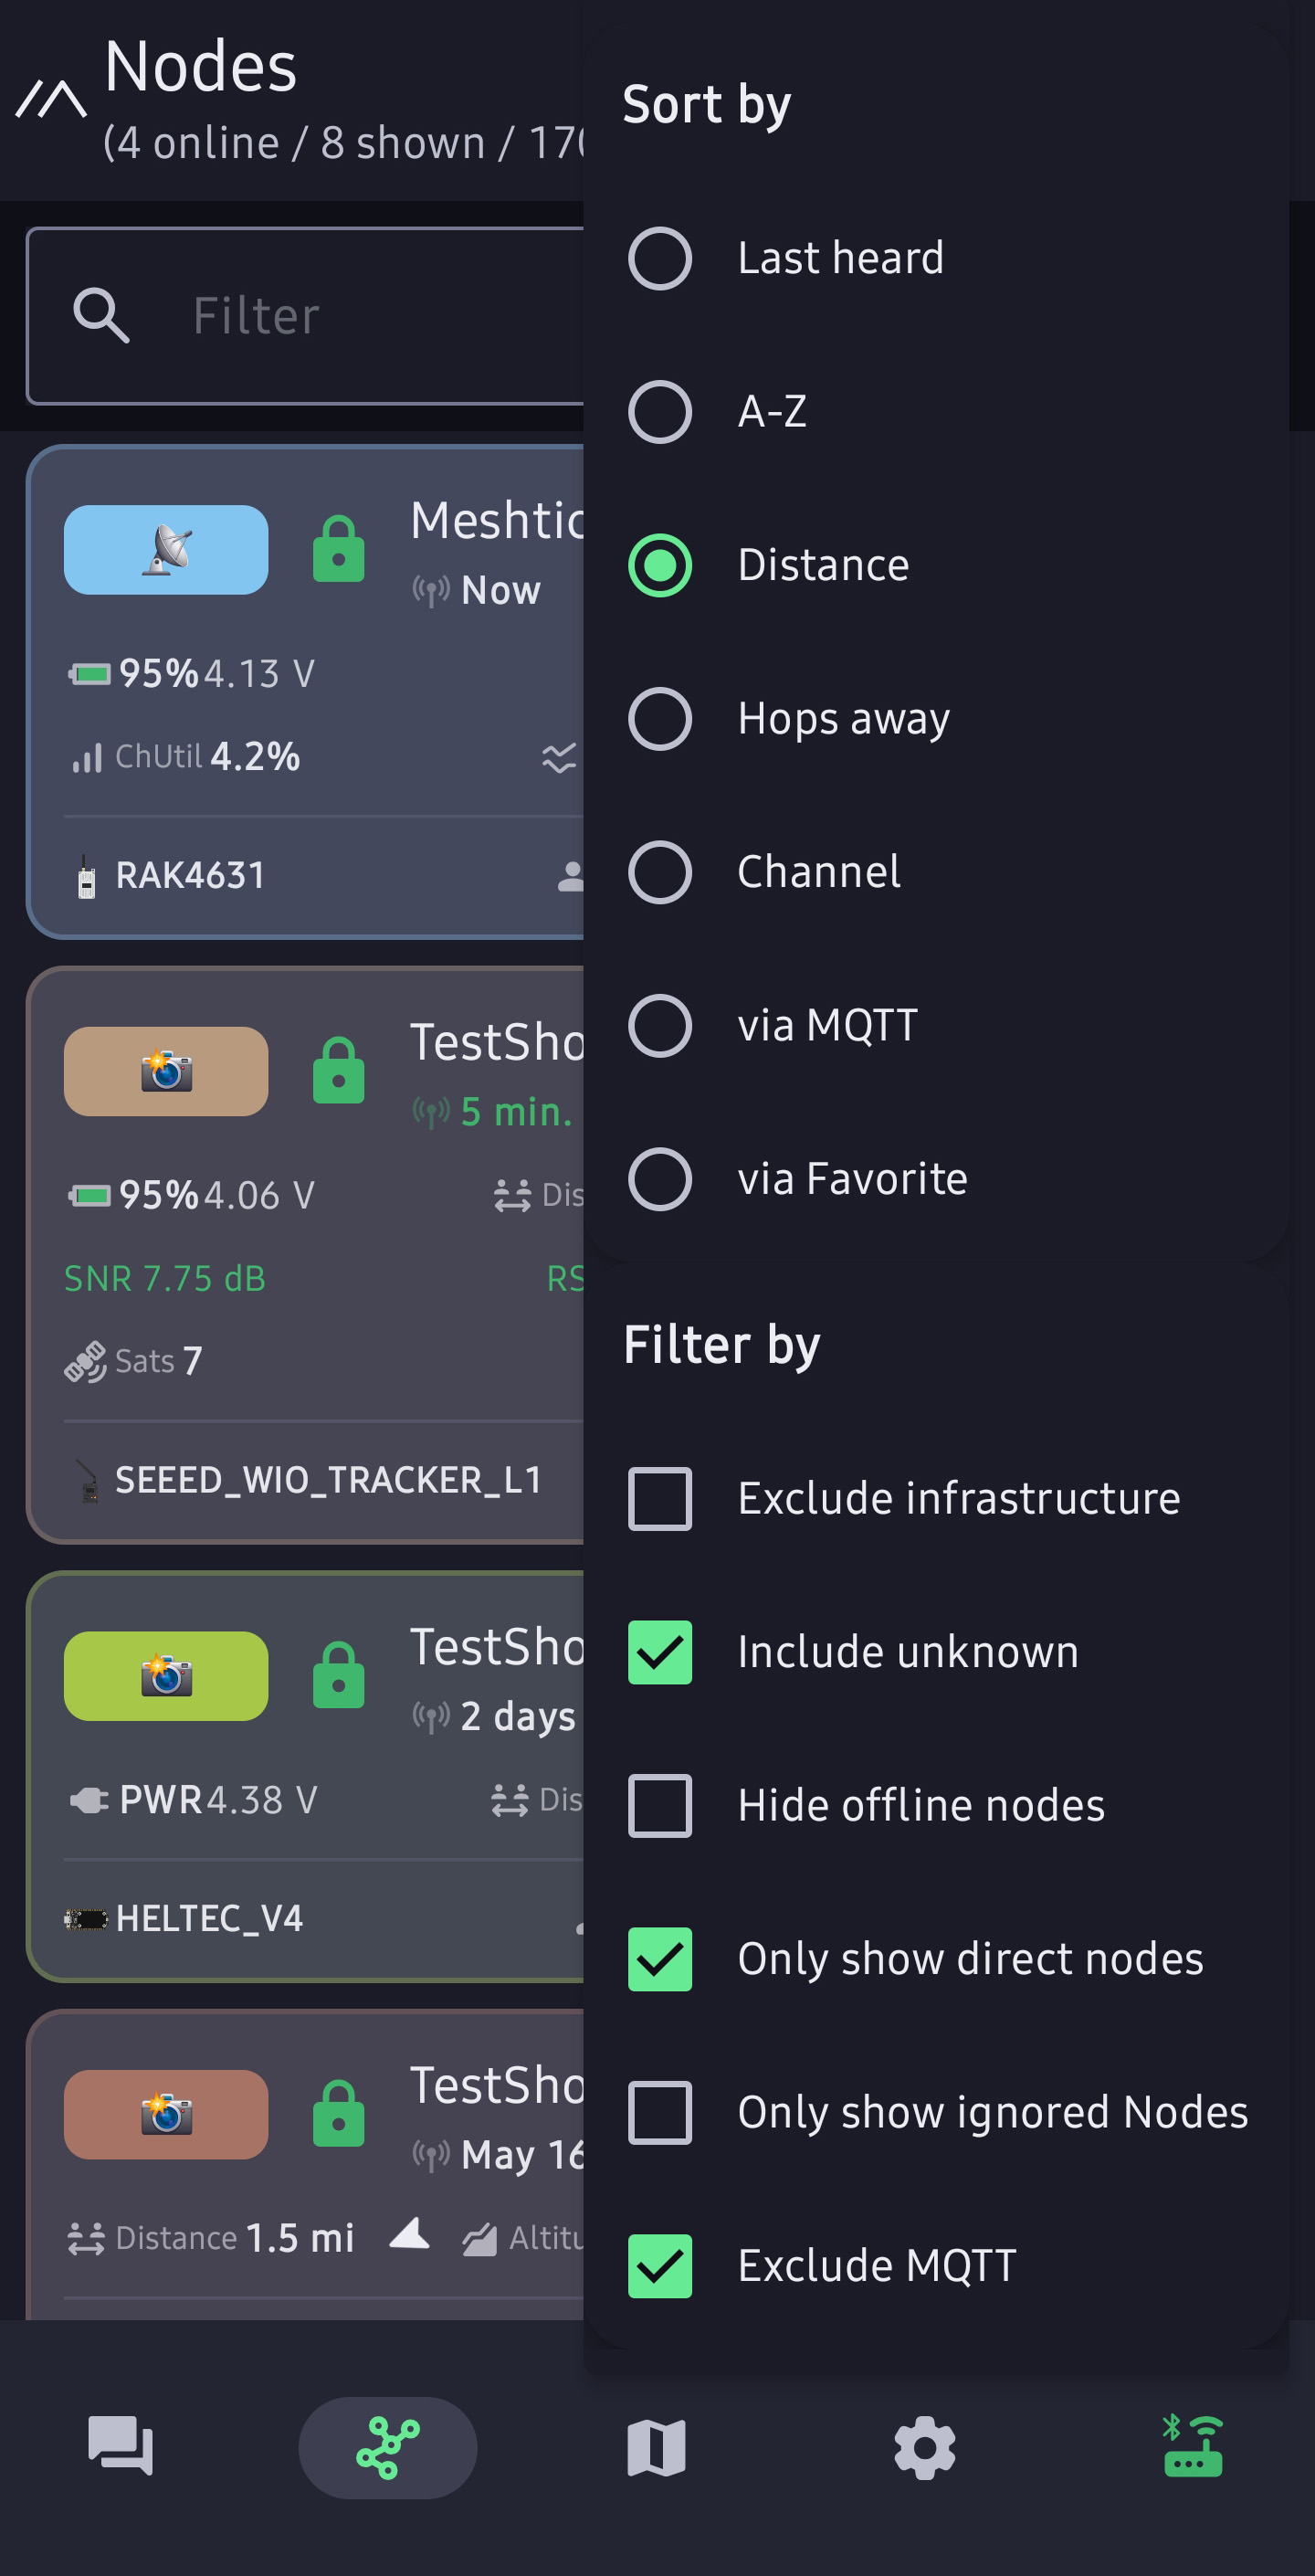
- Open the nodes page in the app.
- Filter for only show direct nodes.
- If you still see nothing after about 30 minutes, try switching from
Long_FasttoMedium_Fast.
Test Message Process Screenshots
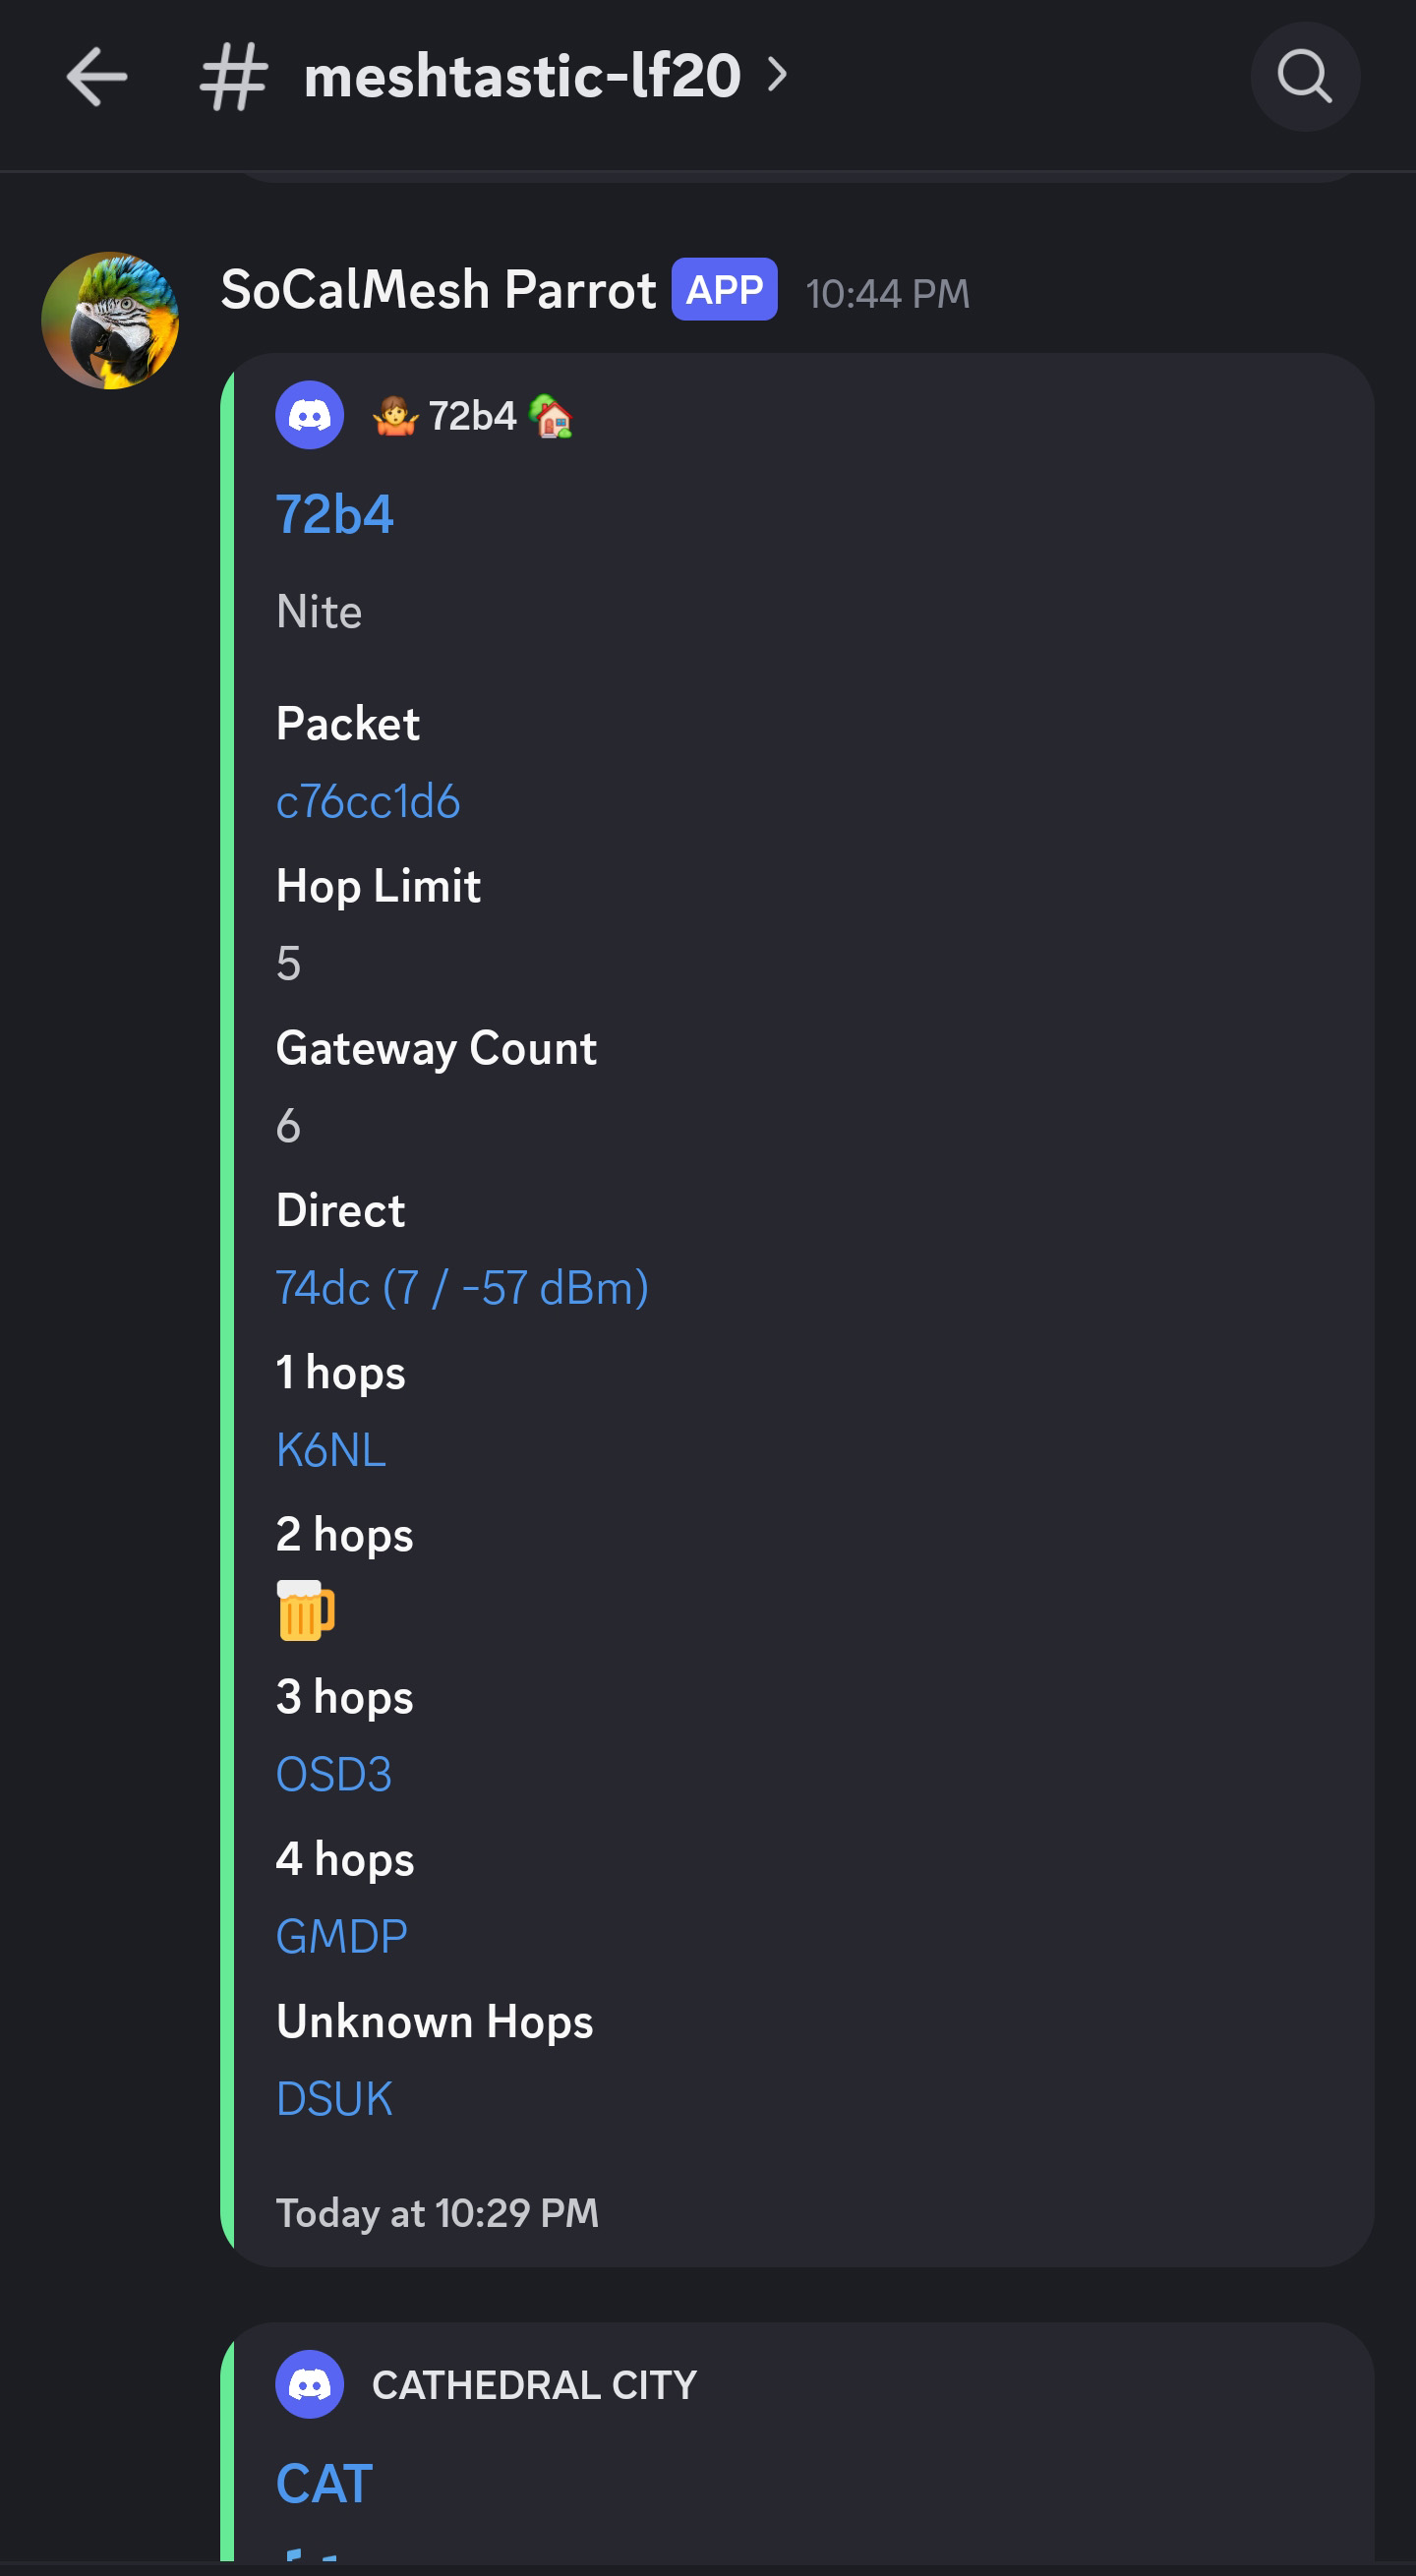
8. Automatic verification with SoCalMesh
If you are using the SoCalMesh Discord, you can link your node and watch for your first message.
- Open the Meshtastic app.
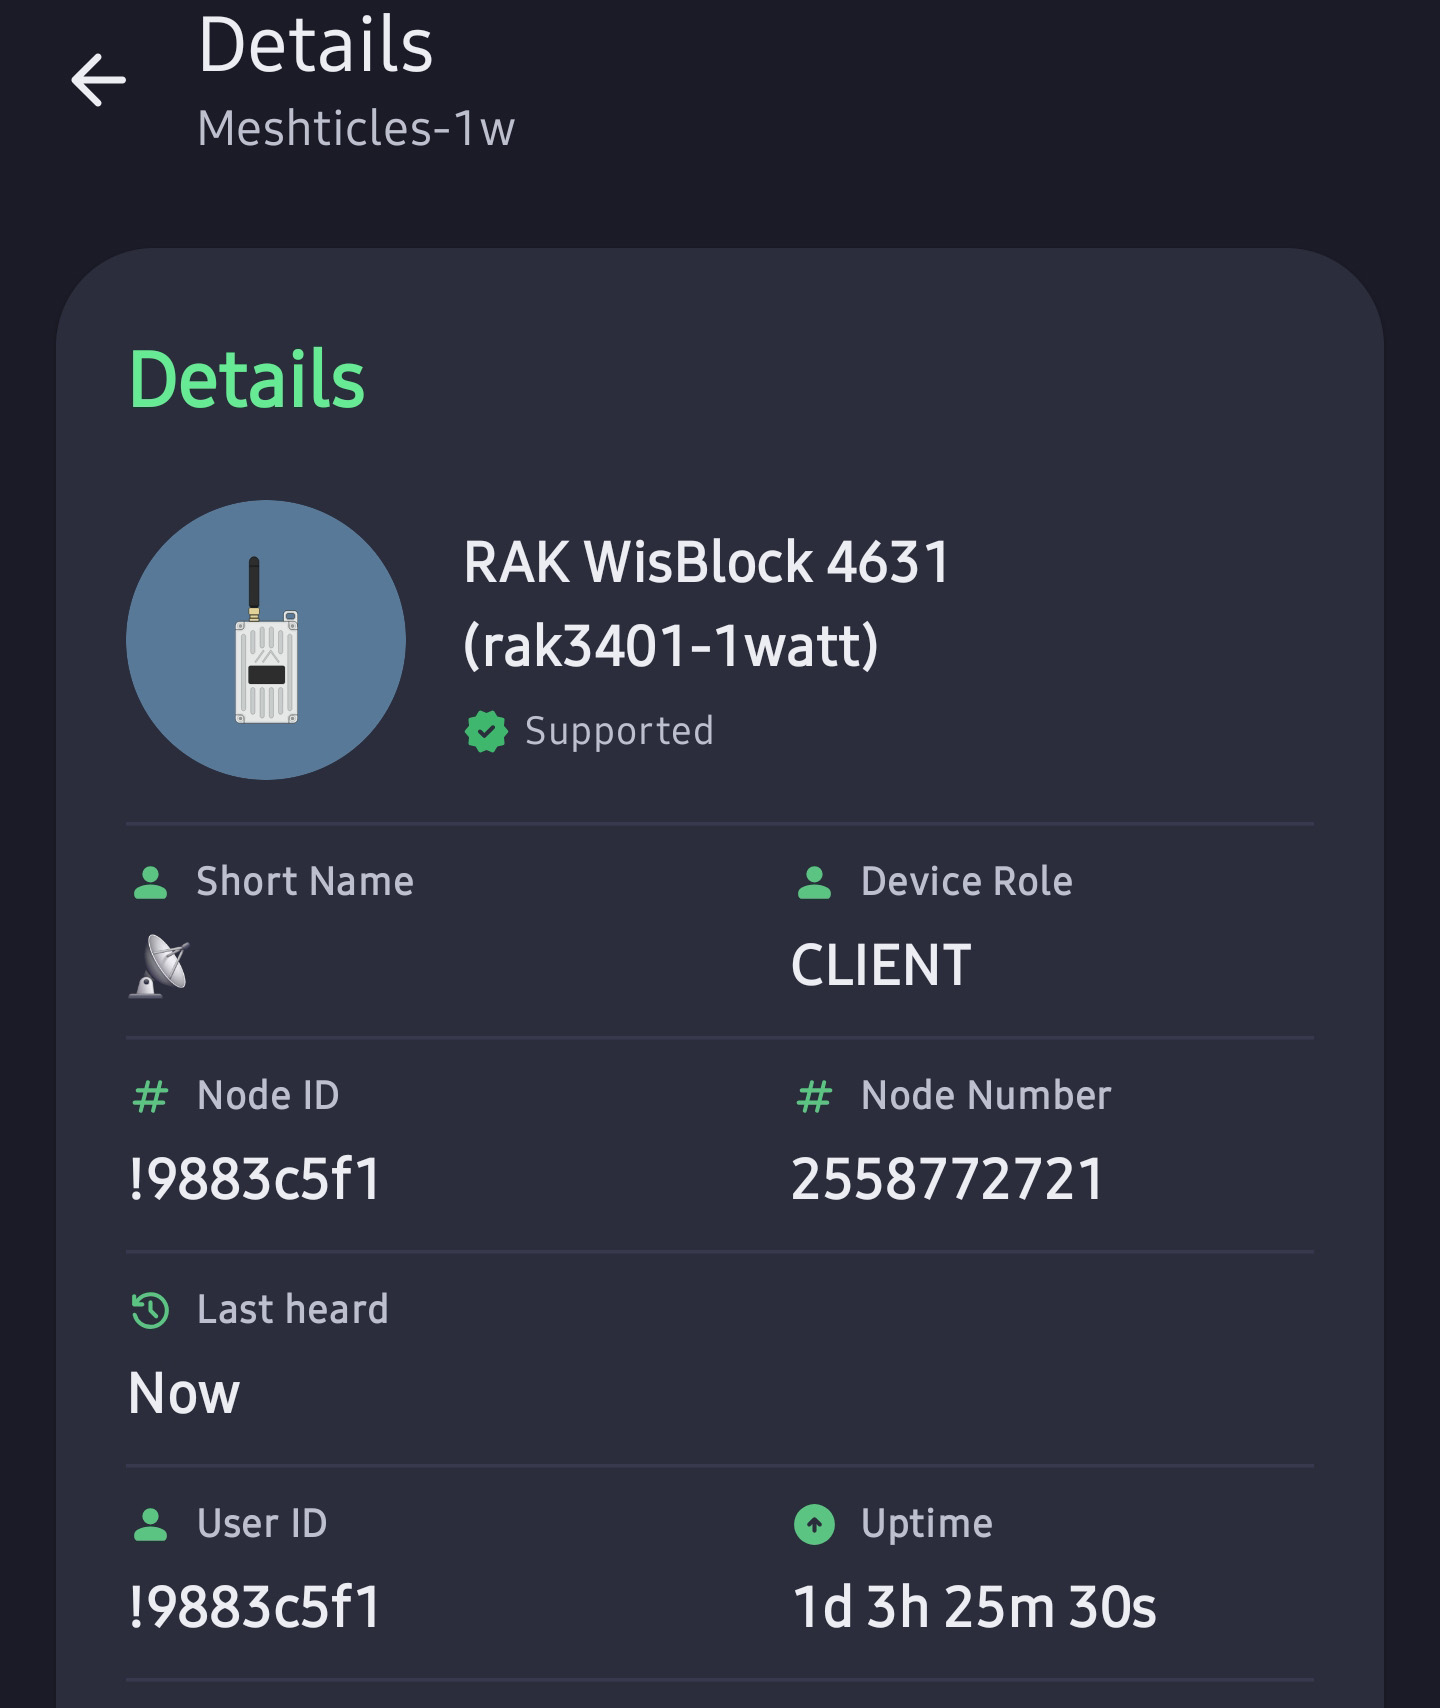
- Go to the nodes page.
- Tap your node.
- Copy the User ID that starts with something like
!1234abcd. - Go to Discord (general is good enough) and type
/linknode. - Paste your node ID into the field.
- Send your first message from the Meshtastic app.
- Watch the Parrot bot in Node Monitoring → meshtastic-lf20 and in a few moments your message should appear.
The Parrot post is useful because it tells you how many hops it took to reach the bot. If you linked the node and added your long name to the device in step 1 it will display here!
Verification Process Screenshots
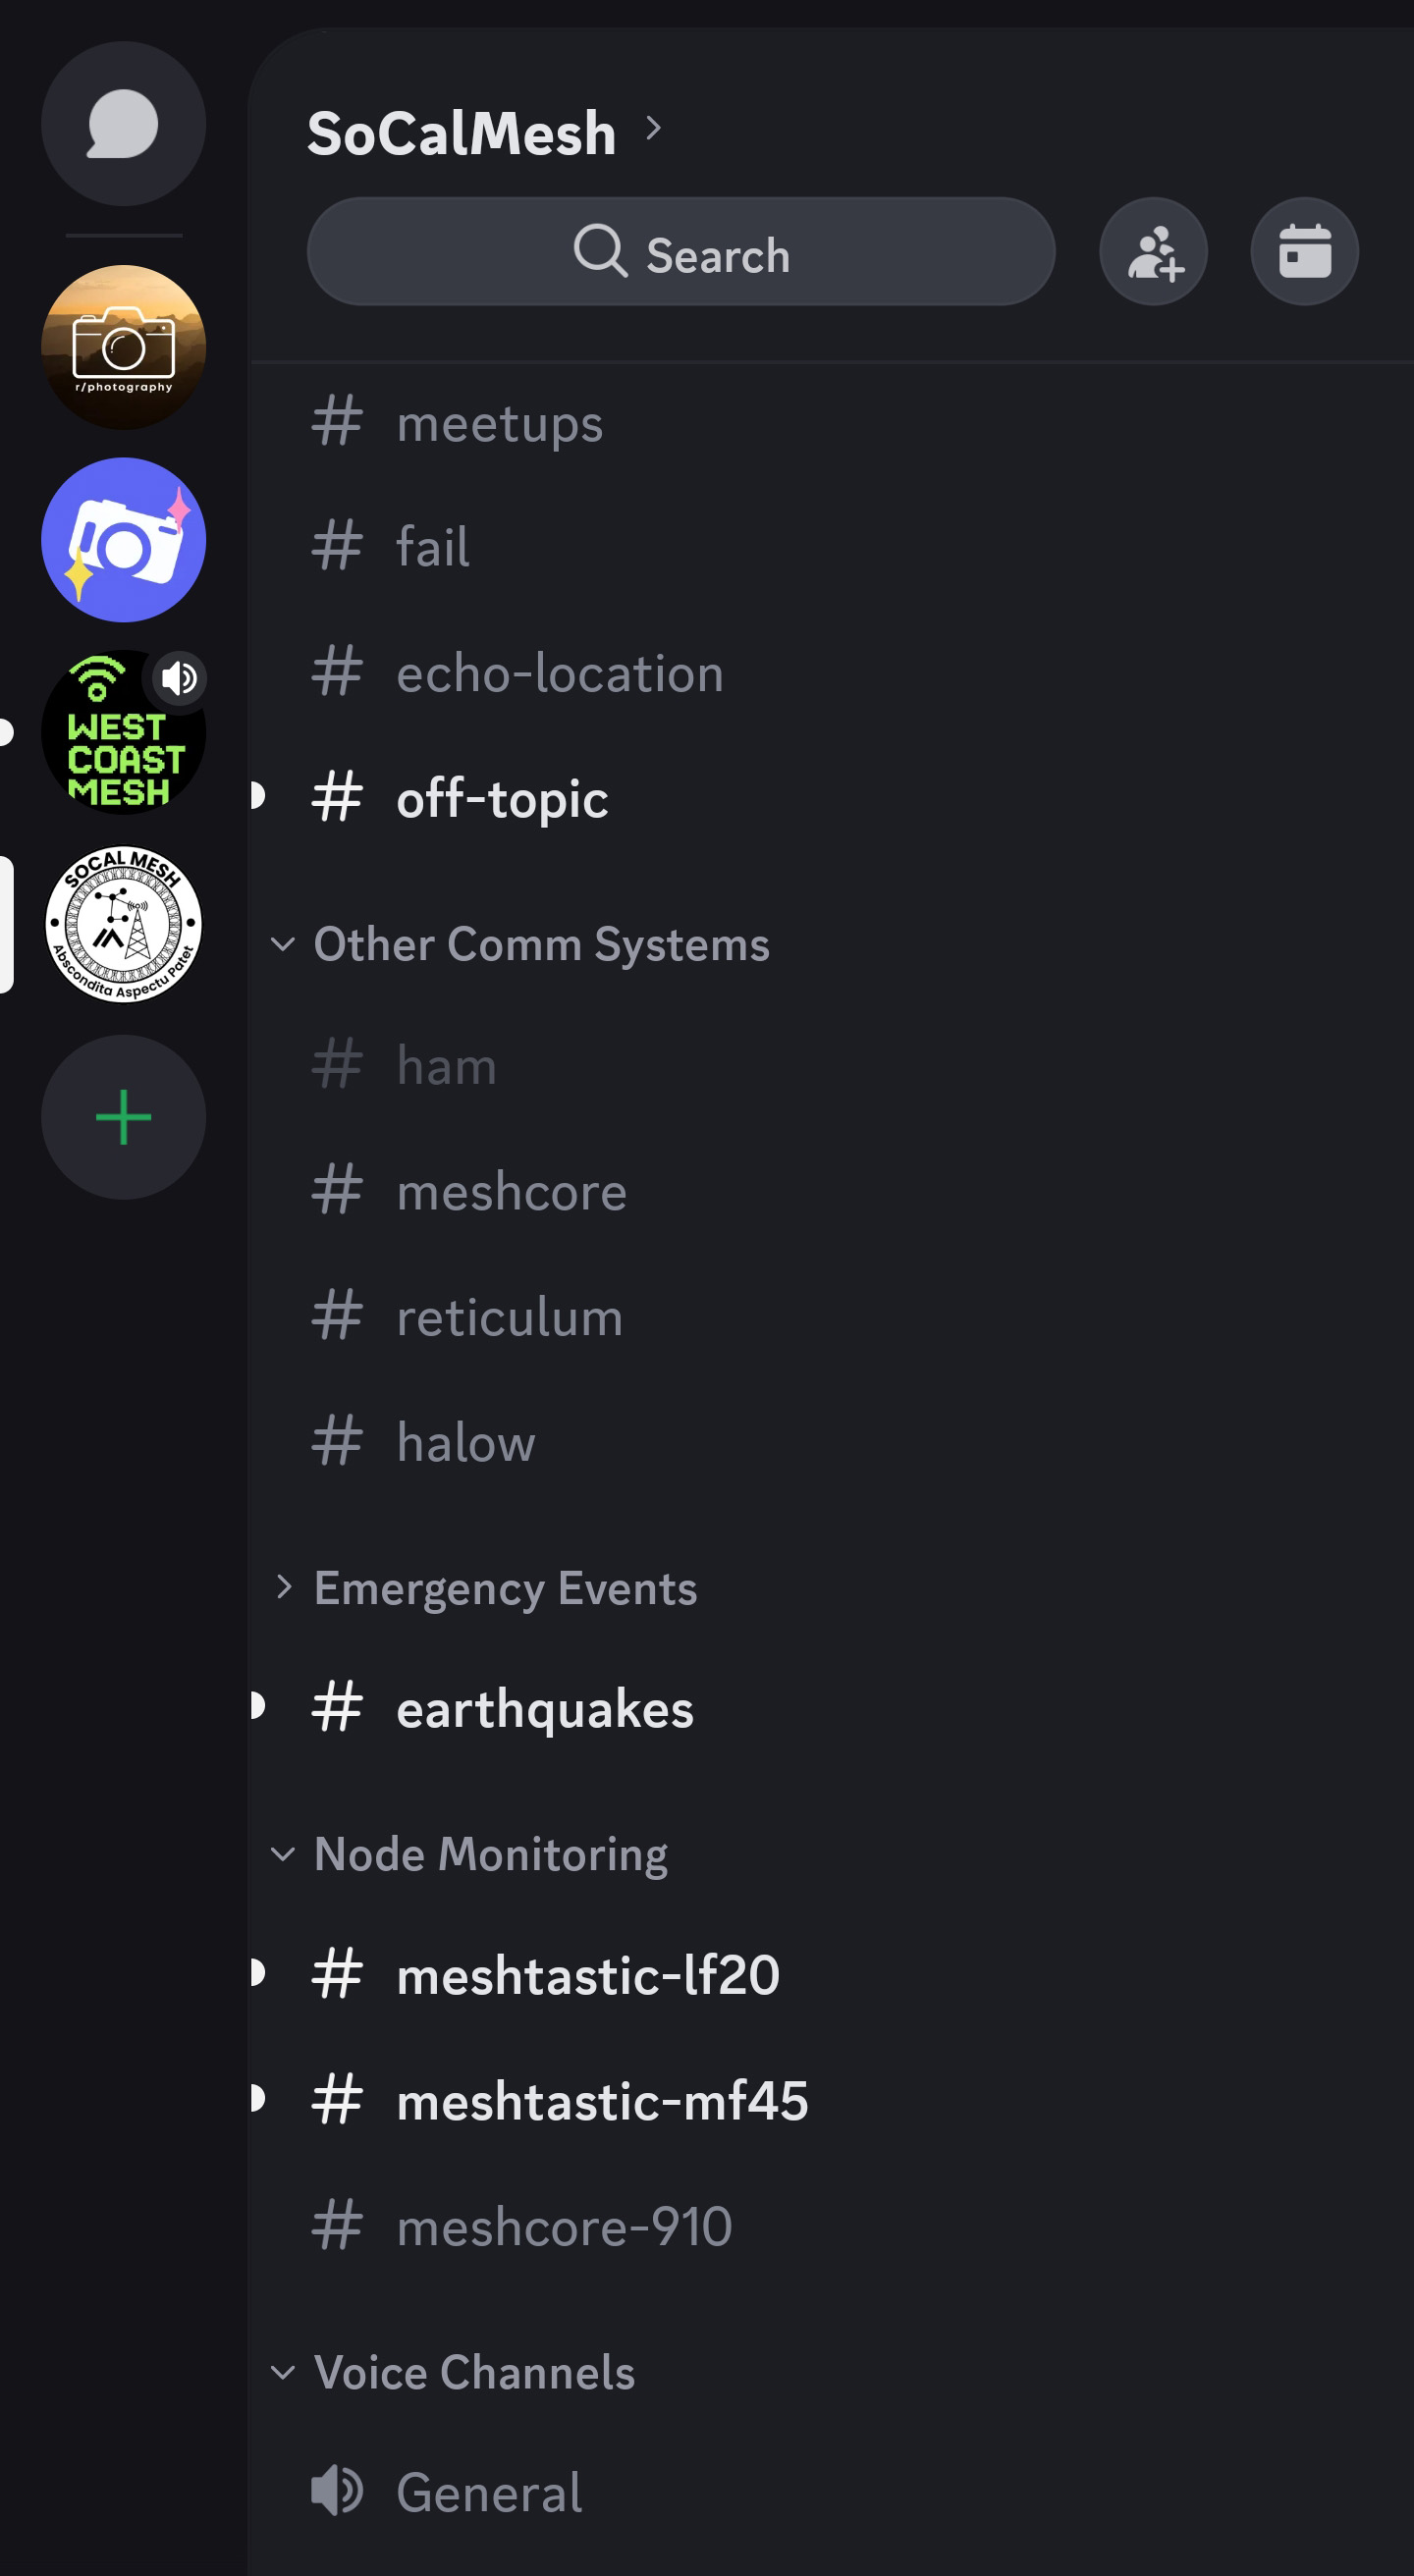
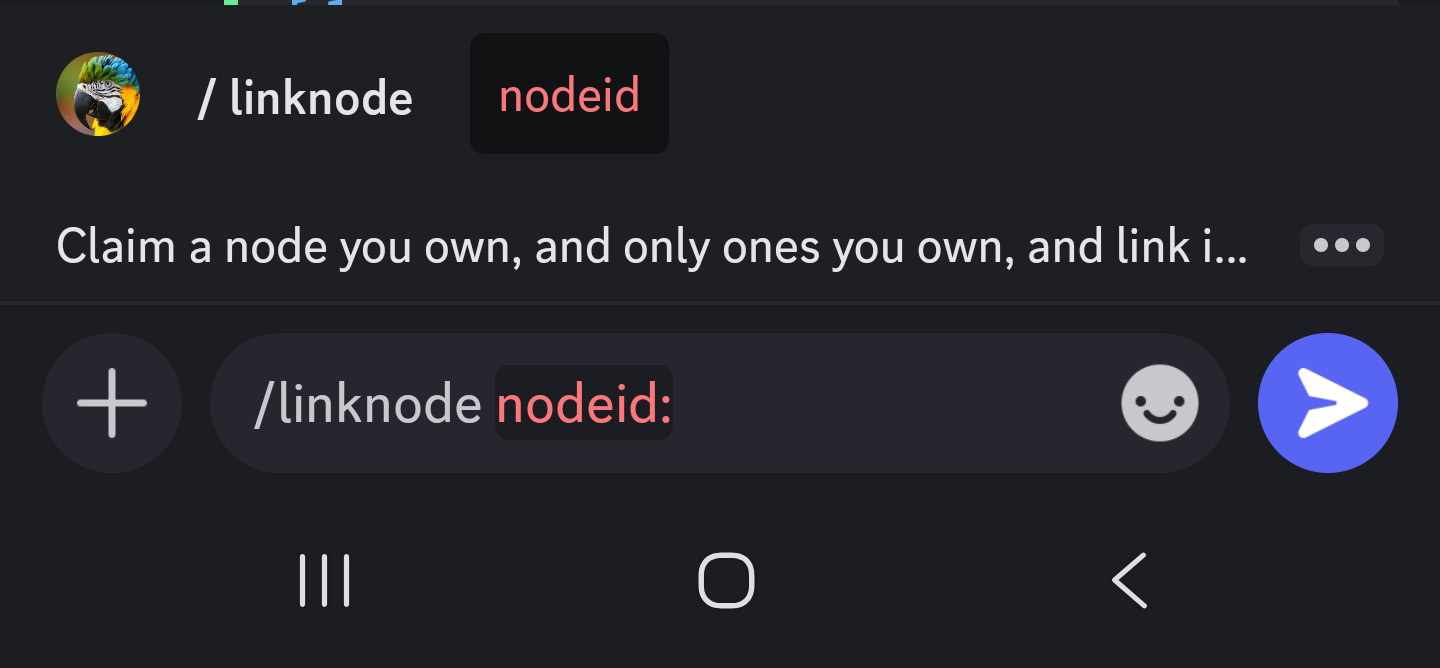
/linknode and press Enter. Note the "Node ID" is YOU